

-
Policy Type
-
Covers staff members assigned to a Pay Period only.
- The Policy being created will only be available for staff members that are assigned to a Pay Period. To learn more about pay periods, click here.
-
Covers any staff in the system.
- The Policy being created is available to all staff members.
-
Covers staff members assigned to a Pay Period only.
-
Pay Code
- Assuming you have pay codes enabled, you can assign a Pay Code to a Policy. If a Pay Code is assigned to a Policy, and you generate a Payroll Report with the Include PTO Hours option ticked, the Pay Code assigned to the Policy will be included under the PTO column of said Payroll Report. Additionally, if you're connected to any of our partner integrations that support pay codes, a successful export of payroll data will include the assigned Pay Code as well.
Accrual Levels are where you will define how, and when, accrual takes place. You can have multiple levels of accruing, but we will focus on one level.

-
Accrual Starts
-
On Hire Date
- If the accrual starts on the hire date, then staff members assigned to the policy will not begin accruing a balance until the next time their hire date takes place. This is also affected by the Accrual Happens field, which we will cover shortly.
-
After
- If you choose the After option, you will be able to select from Days, Weeks, Months, or Years, and enter the amount. If a staff member is assigned to the Policy, and after they have been employed for the duration set, they will then receive the Accrual Amount defined for the Policy.
-
On Hire Date
-
Accrual Amount
- This is where you can define how many hours are distributed to staff members assigned to the Policy, and when said hours should be distributed.
-
Maximum Accrual
- This is where you can determine the maximum amount of hours staff members assigned to the Policy can accrue before the Balance is reset, which is based on the date set under the Accrual Amount row.
-
Carry Over
- This is where you can determine if any remaining hours, prior to the Balance reset, should be carried over when the Balance is reset. If Carry Over is enabled, you can determine how many hours can be carried over via the up to _____ hours per year field.

Next up we have the Accrual Options section.
-
First Accrual
-
Full Amount
- When a staff member is assigned to a Policy, meets the Accrual Starts requirements, and the First Accrual is set to Full Amount, the staff member will receive the full Accrual Amount that is set regardless of when the accrual process begins / ends.
-
Prorated
- When a staff member is assigned to a Policy, meets the Accrual Starts requirements, and the First Accrual is set to Prorated, the staff member will receive an amount that is based on when they met the Accrual Starts requirements, and when the accrual process begins / ends.
-
Full Amount
-
Carry Over Date
-
1st of January
- If the Carry Over field is marked as Yes, then you will want to choose what the Carry Over Date is. If you've chosen 1st of January, then any remaining balances (determined by the Maximum Accrual field) will be carried over on that date.
-
Staff Hire Date
- If the Carry Over field is marked as Yes, then you will want to choose what the Carry Over Date is. If you've chosen Staff Hire Date, then any remaining balances (determined by the Maximum Accrual field) will be carried over on the staff members hire date.
-
1st of January
-
Accrual Happens
-
At The Beginning of the Period
- This option is directly affected by how the rest of the Policy has been defined. For example, if the Policy states that the Accrual Starts on the Hire Date, the First Accrual is the Full Amount, and a staff member has a Hire Date of May 26th, then the staff member will receive the full Accrual Amount on May 26th, 2018.
-
At The End of the Period
- These options are directly affected by how the rest of the Policy has been defined. For example, if the Policy states that the Accrual Starts on the Hire Date, the First Accrual is the Full Amount, and a staff member has a Hire Date of May 26th, then the staff member will receive the full Accrual Amount on May 25th, 2019.
-
At The Beginning of the Period
-
Allow A Negative Balance
- This option determines if staff members can request Paid Time-Off that will exceed their current Balance. If the option is enabled, and they request PTO that will exceed their current Balance, then they will have a negative Balance.
-
Time-Off Must Be Booked __ Days In Advance
- This is where you can determine how many days in advance are required to request PTO.
-
Allow Requests To Be Made For Past Dates
- By default, you cannot request PTO if the request date is in the past. However, if this option is enabled, staff members will be able to request PTO, even if it's a day in the past.
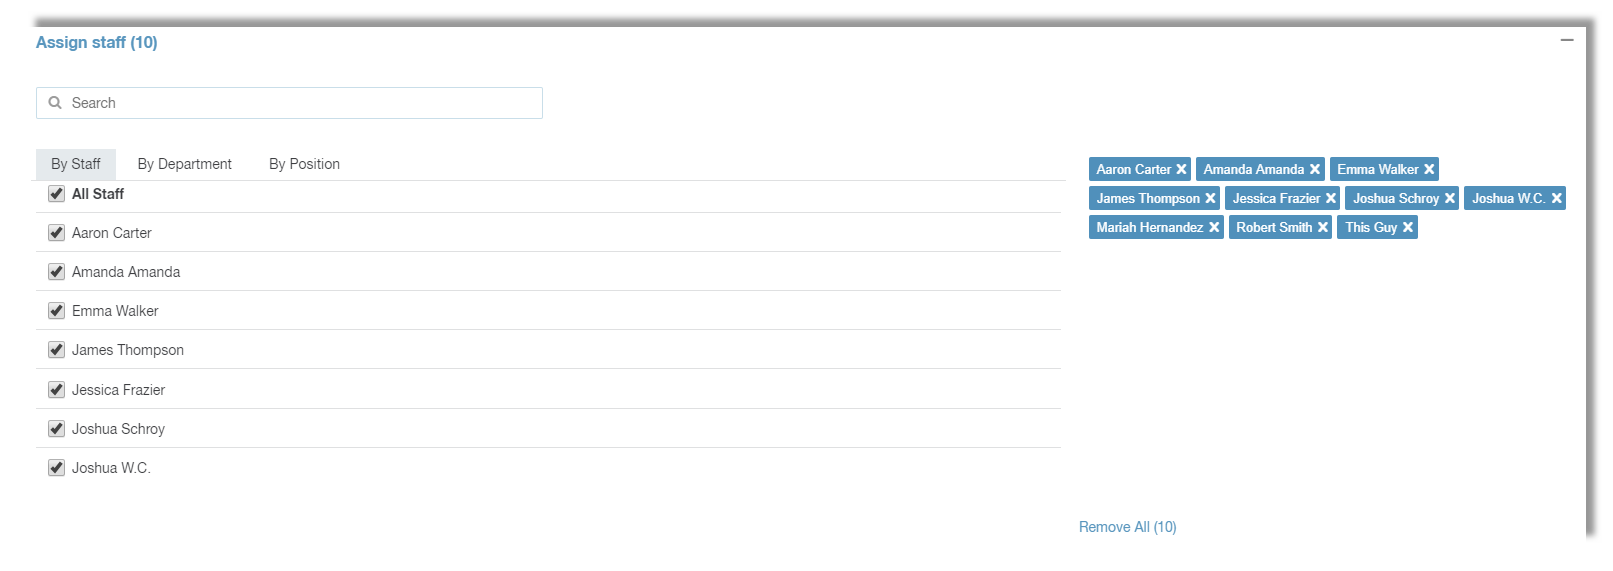
Finally, we have the Assign Staff section.

This is where you will assign staff members to the Policy being created, or edited. You can search for a specific staff member using the Search field. You can filter By Staff, By Department, and / or By Job. Assigned staff members will appear on the far right, and can be individually removed by clicking the small x's, or you can remove all staff members at once by clicking the Remove All button. Once you're satisfied with the Policy, simply click the Save button at the bottom of the page.
__________________________________________________________________________________

We want to hear about your great ideas. If you have a feature request, enhancement suggestion, or improvement, let us know by submitting them to to our Ideas page. Your submission can receive votes from other Paycor Scheduling users, or you can vote on ideas yourself. Simply click the ADD A NEW IDEA button below to check it out.
Cheers!

