With Paycor Scheduling, you're able to easily import staff members by using a CSV / Excel file. This is one of the quickest way to to get your team, and their personal data, into the account. At the end of this article, we've included a properly formatted template that you can use for importing staff member data. Below is the required, and optional, fields that should be included in the CSV / Excel file:
CSV / Excel File Requirements
- First Name (Required)
- Last Name (Required)
- E-Mail (Optional)
- Phone (Optional)
- Employee ID (Optional)
- Address Line 1 (Optional)
- Address Line 2 (Optional)
- City (Optional)
- State (Optional)
- Zip (Optional)
- Country (Optional)
- Position (Optional)
- Department (Optional)
- Pay rate (Optional – Hourly Pay Rate)
NOTE: If you do not wish to include optional data, those columns should remain blank, but the header does need to be included in the file. Additionally, if a Position / Department being imported does not exist in your account, it will be automatically created for you.
Below, you will see an example image of the required, and optional, headers that should be present within the CSV / Excel file you will be importing.

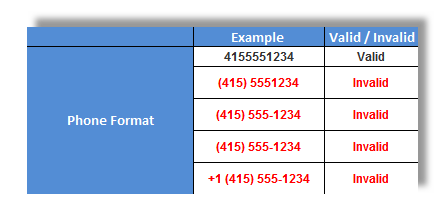
For phone numbers being imported, there is only one valid format. Please ensure that the valid format shown below is followed for all phone numbers being imported:
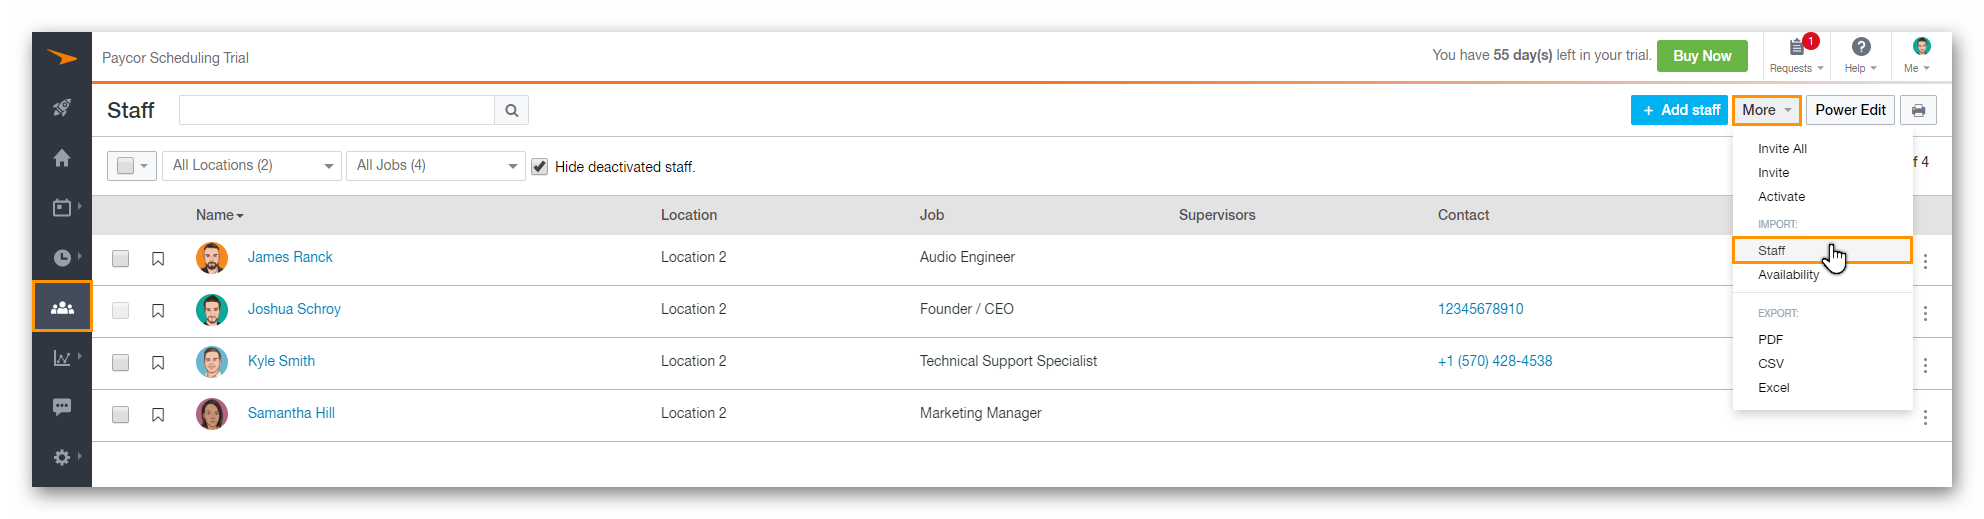
Once your file is ready, you can import it into your Paycor Scheduling account. To do so, please sign in to your Paycor Scheduling account, and navigate to the Staff page. Click the More button in the upper right hand corner, then select the Import - Staff option.
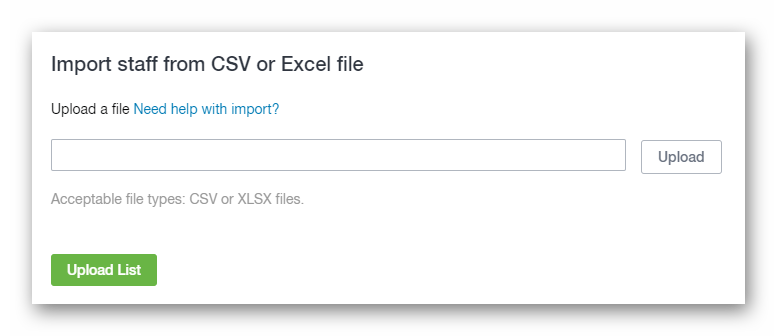
Once the Import - Staff option is clicked, you will be presented with a way to browse your files, and upload the CSV / Excel file. To browse your file, click the Upload button.
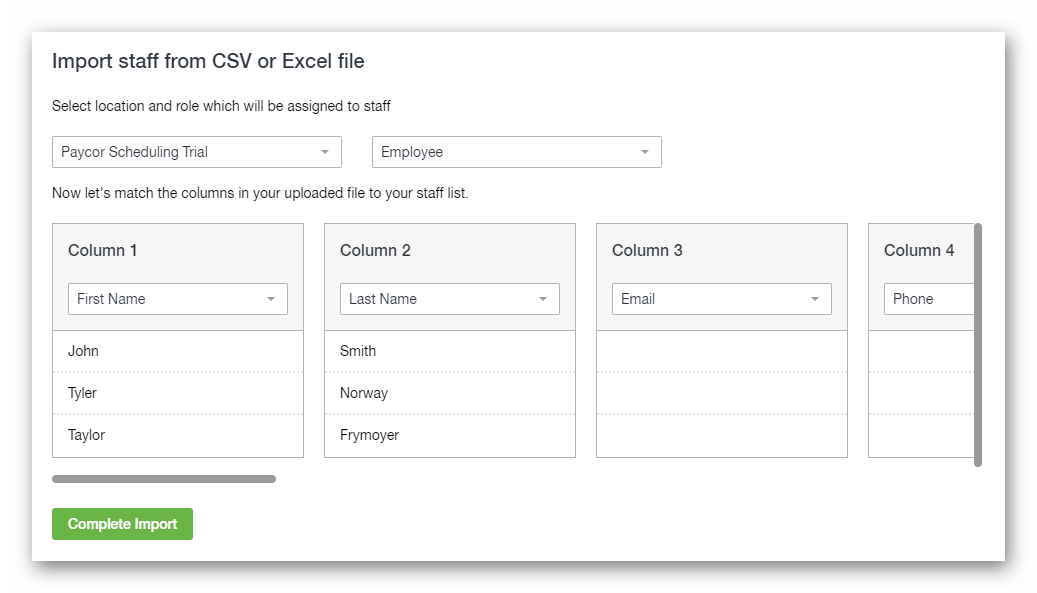
Click the Upload List button as soon as you've selected the correct file, and you will now be able to make some adjustments to how the data is imported, including the Location the data is being imported to, and what User Role staff members should be by default. Once you're satisfied with the columns, Click the Complete Import button.
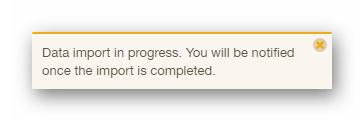
Once the Complete Import button is clicked, you will be redirected back to the Staff page, and you will be informed of the data import via a notification at the top of the screen.
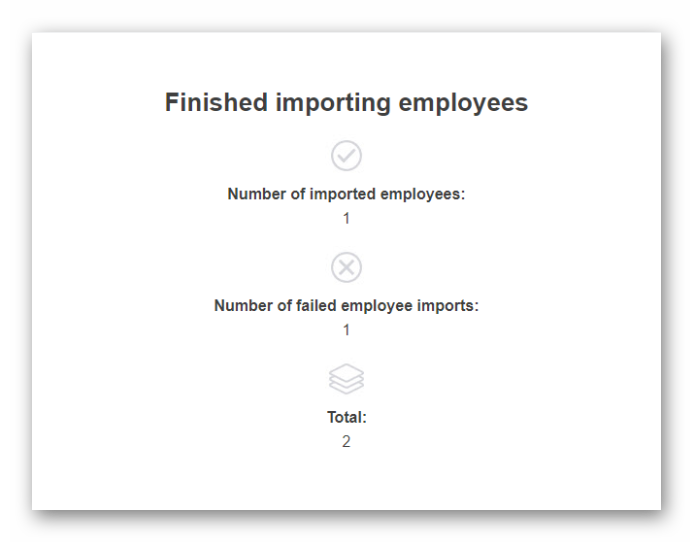
Finally, an email will be delivered to the email address you have assigned to your Profile Details page, specifying the amount of successful / failed rows that were a part of the import.
Below is the downloadable example template mentioned at the beginning of this article. We've included that here so you can review the proper format. Feel free to use it at any time!
__________________________________________________________________________________

We want to hear about your great ideas. If you have a feature request, enhancement suggestion, or improvement, let us know by submitting them to to our Ideas page. Your submission can receive votes from other Paycor Scheduling users, or you can vote on ideas yourself. Simply click the ADD A NEW IDEA button below to check it out.
Cheers!