INTRODUCTION
If you have a Paycor Scheduling account, as well as a Zendesk account, you can easily connect the two platforms, allowing you and your team to utilize Paycor Scheduling's Time Clock via Zendesk. You'll be able to see who is working, who's taking a break, and more, all in real time. You can even create / assign shifts to staff members, all directly from the Zendesk application. Interested? Great! Let's get started.
IMPORTANT NOTE: In order to successfully connect your Paycor Scheduling account with your Zendesk account, you will need access to the App Center page within your Paycor Scheduling account. The App Center page requires an Advanced plan. Before proceeding, please ensure that you're subscribed to an Advanced plan via the Me - My Account - Subscription - Plan - Adjust Plan page.
SETUP
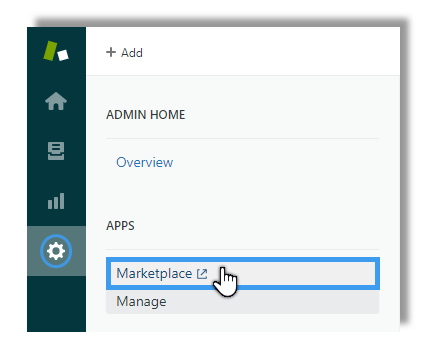
When logged into your Zendesk account, click the Admin button (gear icon) found on the far left side of the page, then click the Marketplace button found under the APPS column.
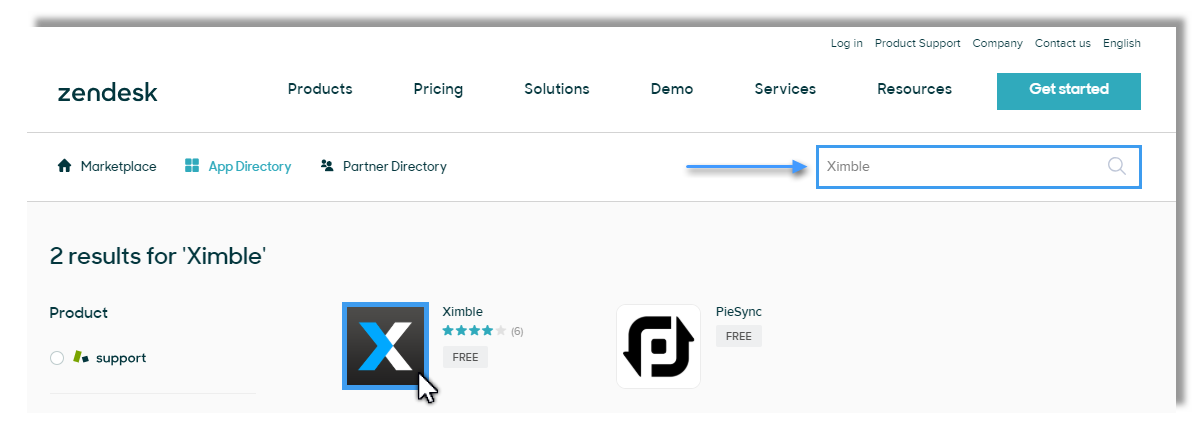
Once you're on the Zendesk App Marketplace page, enter Paycor Scheduling into the Search The App Directory search bar. Paycor Scheduling should appear in the results below. Click on the Paycor Scheduling logo.
You're now on the page where you can integrate Paycor Scheduling with Zendesk Support. To continue, click the Install button to the right of Paycor Scheduling description.
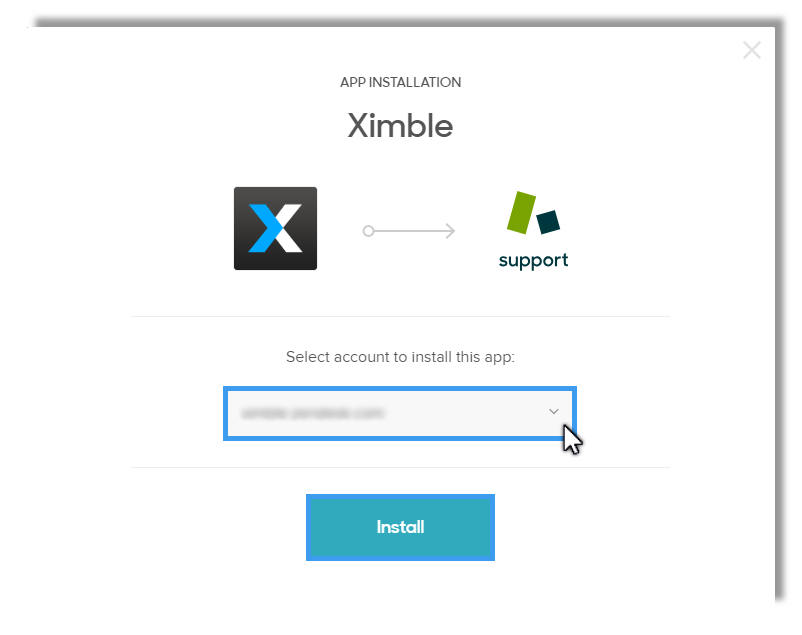
Once the Install button is clicked, a new window will appear where you will be required to select an account (assuming you have more than one) where the widget will be installed. Once you've selected the account, click the Install button.
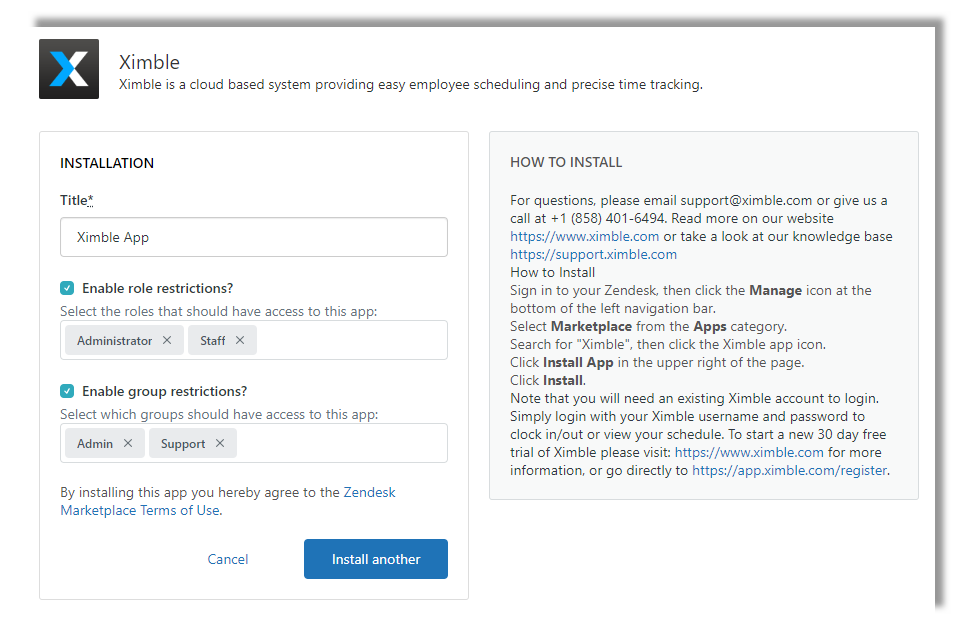
You will now be able to name the Paycor Scheduling widget, and enable role / group based restrictions to those that are able to utilize Paycor Scheduling within Zendesk. Once you're ready, click the Install button.
FUNCTIONALITY
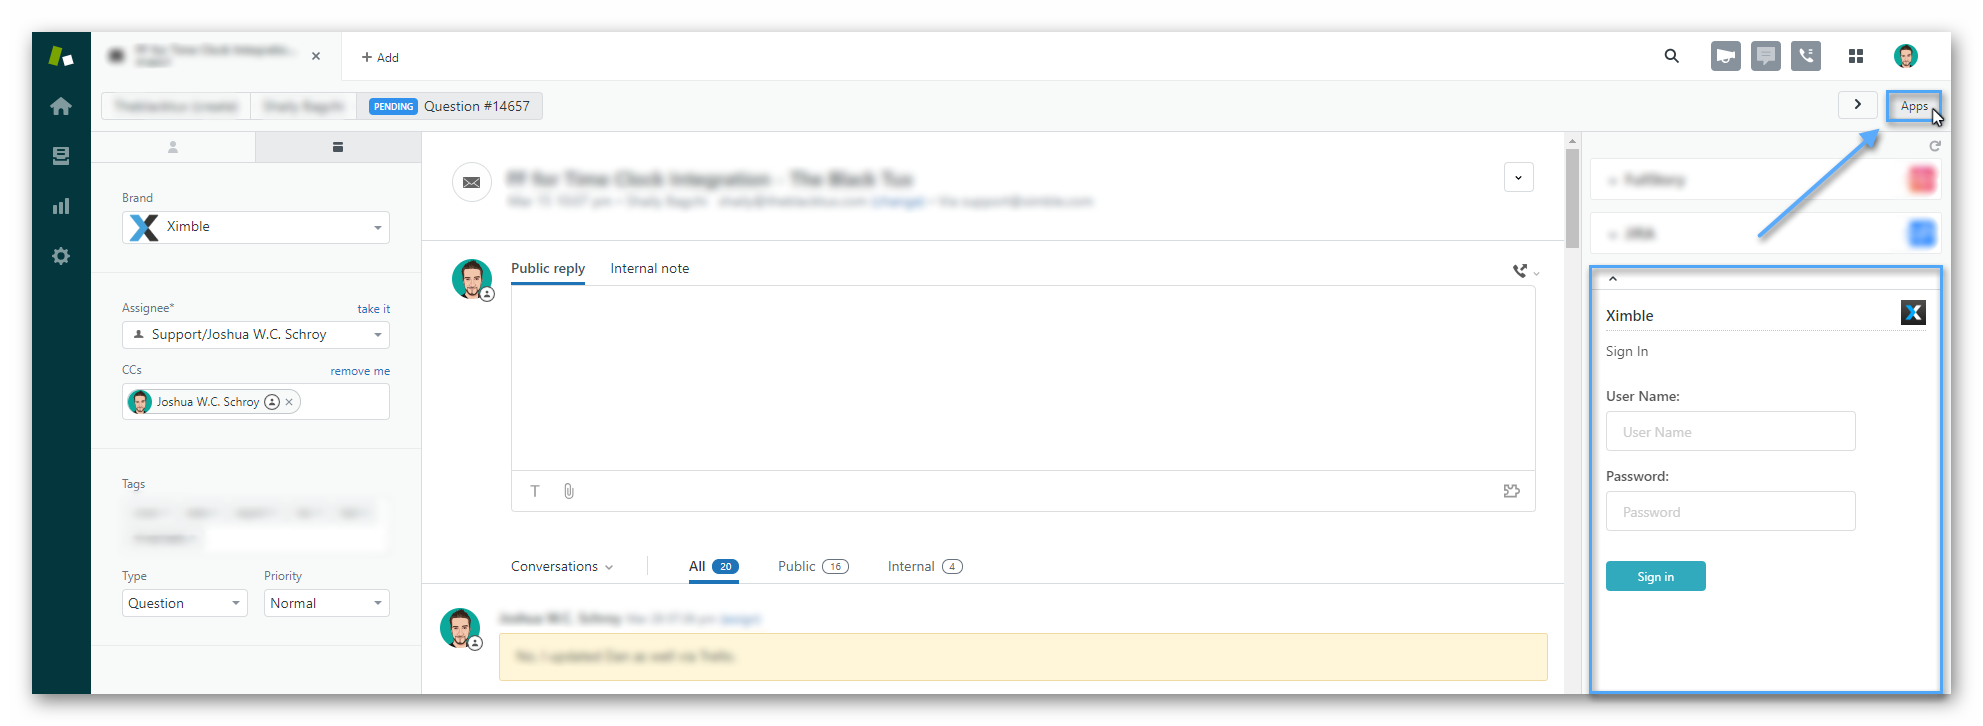
Once the Paycor Scheduling widget has been installed, you can now sign in to your Paycor Scheduling account. You'll first want to click the Apps button in the upper right hand corner of Zendesk (when viewing a ticket), then locate the Paycor Scheduling widget. Enter in your username / password combination, then click the Sign In button. You'll want to keep in mind that the Paycor Scheduling widget may look a bit different for each staff member. This is determined by the User Role assigned, and restrictions in place.
Once you've successfully signed in, you'll notice three tabs at the top of the widget:
-
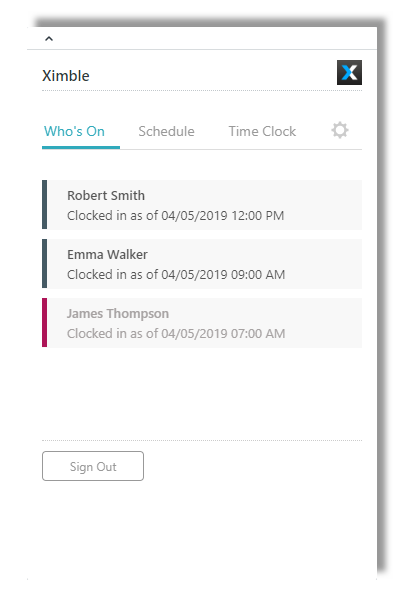
Who's On
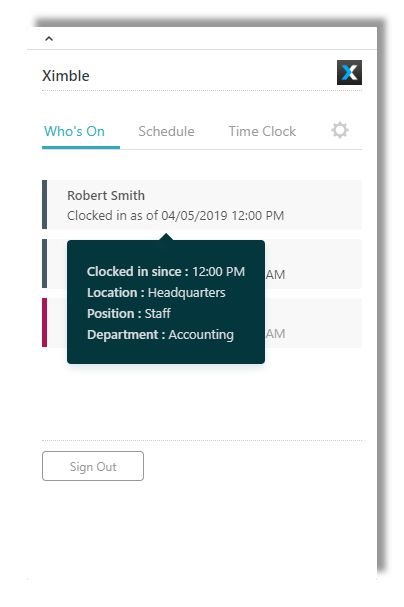
- This is the default tab, and will be the first thing you see when you login to Paycor Scheduling via Zendesk. This will display staff members that are currently clocked in, their Location, Job, and Department. The grayed out staff members indicate that a break is currently being taken. Hovering over any of the shifts will display a more detailed amount of information.
-
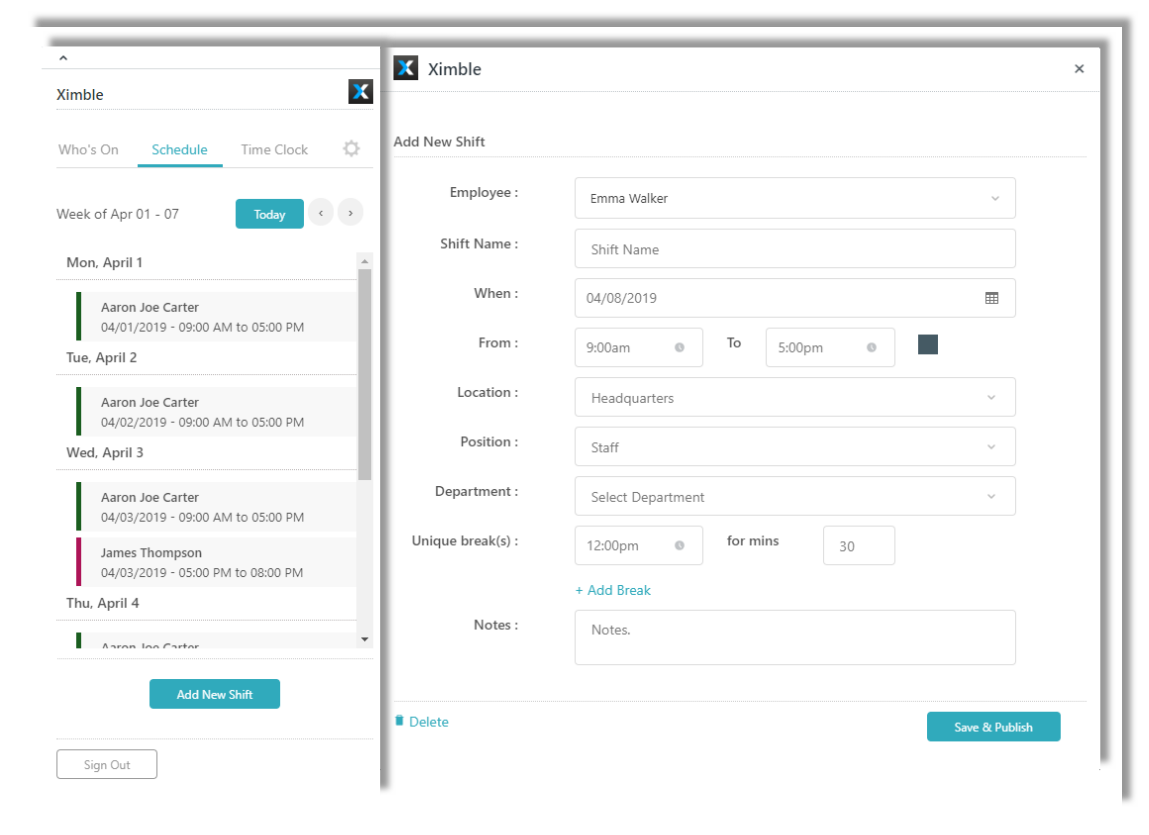
Schedule
- This tab will display shift information, allow you to filter through the weeks, and even create new shifts. To create a shift, simply click the Add New Shift button. When you're finished editing the new shift, click the Save & Publish button.
-
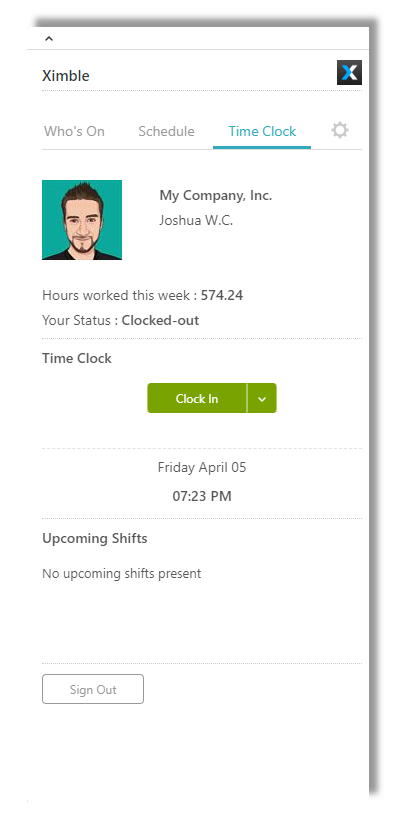
Time Clock
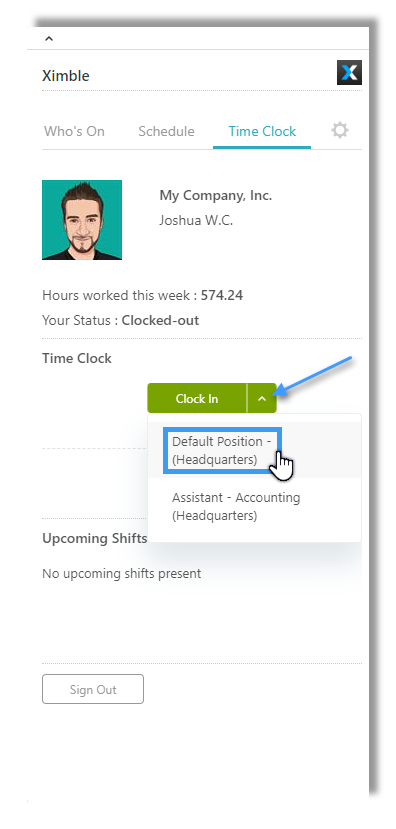
- Finally, we have the Time Clock tab. This tab displays some information specific to you, and allows you to clock in / clock out. Clicking the down arrow to the right of the clock in / clock out button allows you to choose a Job.
-
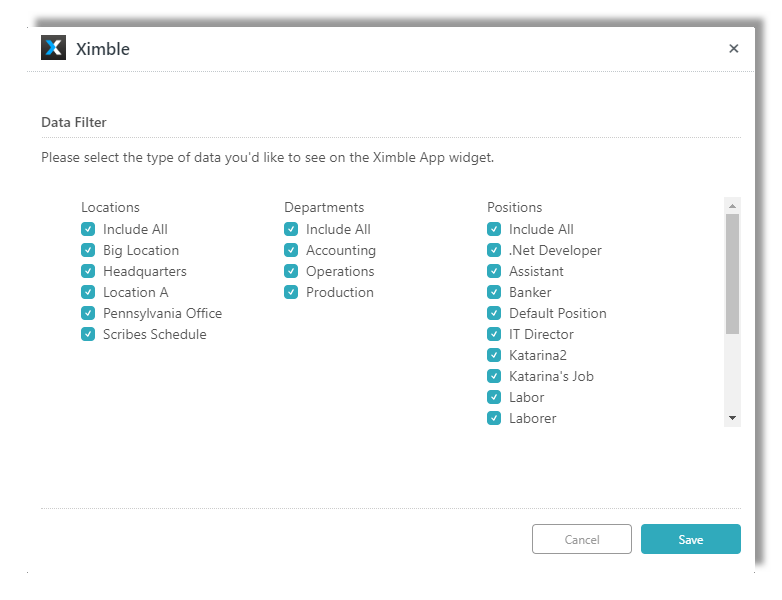
Data Filter
- Manager level users will be able to click the Settings tab (gear icon) to filter by specific data types. This is useful when there are a lot of locations, jobs, and departments.
If you prefer watching over reading, feel free to watch the Paycor Scheduling + Zendesk Integration Video Tutorial by clicking the play button below.
__________________________________________________________________________________
We want to hear about your great ideas. If you have a feature request, enhancement suggestion, or improvement, let us know by submitting them to to our Ideas page. Your submission can receive votes from other Paycor Scheduling users, or you can vote on ideas yourself. Simply click the ADD A NEW IDEA button below to check it out.
Cheers!

