
THE PAY PERIOD
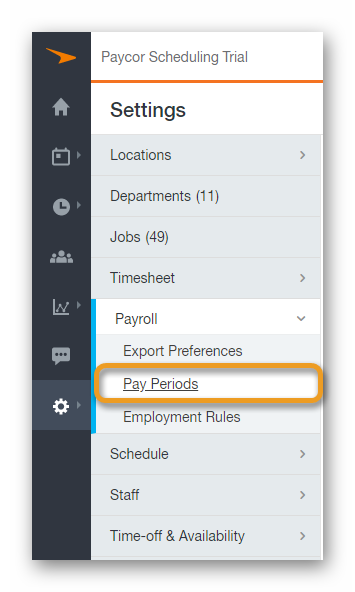
What's a Pay Period, and how does it work? A Pay Period is a recurring length of time over which staff member time is recorded, and then paid. Paycor Scheduling's Payroll Report allows you to choose a Custom date range, but you can also choose to set up a Pay Period. Let's set one up now. You'll want to start by navigating to the Settings (gear icon) - Payroll - Pay Periods page using the main navigation on the far left side of your Paycor scheduling account.
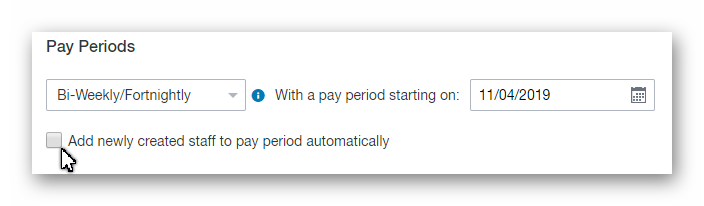
This page is where you will be setting up the Pay Period, and determining who should be assigned to it. There are four different types of pay periods to choose from, and each determines how often your staff members are paid.
- Weekly
- Bi-Weekly / Fortnightly
- Semi-Monthly
- Monthly
The second field, to the right of the Pay Period type field, is where you can choose the day that the Pay Period starts, or there will be more than one field. This is dependent upon the type of Pay Period that you've selected.

Directly below these options is a convenient option to automatically add newly created staff members to the Pay Period. If this is something you would like to see happen when new staff members are created, make sure to enable this option.
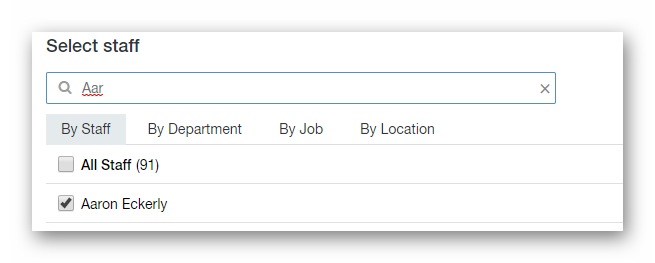
Once you're satisfied with the way Pay Period is set up, you can add staff members to it by ticking the boxes to the left of their names. Alternately, you can click the All Staff button to assign all staff members to the Pay Period. The number to the right of this button indicates the amount of staff members that will be assigned to the Pay Period should you choose to select All Staff.
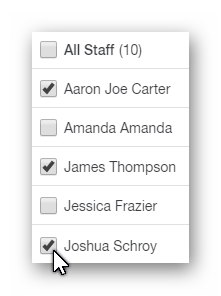
Staff members can be removed from the Pay Period the same way. Another way to remove staff members from the Pay Period is by clicking the small x's to the right of their names when they've already been added to the Pay Period.

The last way to remove staff members from a Pay Period is by clicking the Remove All button on the very far right. This option will display a number which is the amount of staff members that are currently assigned to the Pay Period.

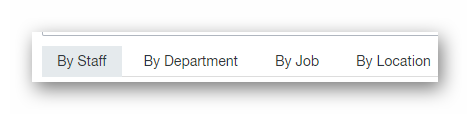
The staff members displayed here can be filtered in a number of ways.
- By Staff
- By Department
- By Job
- By Location
The search bar above the filters let's you go a step further by allowing you to enter the name of a staff member. This will work with each letter entered. To delete what you've entered, simply click the small x within the search bar, located on the far right.
The last step to officially creating a Pay Period within your Paycor Scheduling account is clicking the Save button at the bottom of the page.

THE PAYROLL REPORT
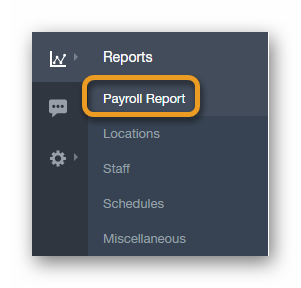
Now that you've set up your Pay Period, you can now generate a Payroll Report using said Pay Period. Let's head over to the Payroll Report page now. To do so, hover over the Reports tab (graph icon), and click the Payroll Report button.
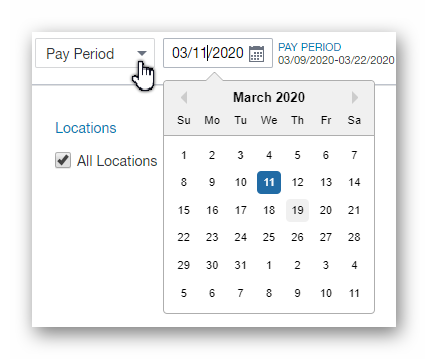
Once you're on the Payroll Report page, the very first field, directly below the large Reports text, is where you can select Pay Period instead of Custom. Once you've selected Pay Period as the Payroll Report type, selecting a date range will automatically determine the Pay Period you've set up for that date range.
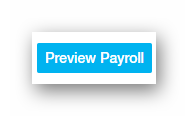
At this point, the rest of the Payroll Report can be configured to your liking. When you're ready to continue, click the Preview Payroll button in the upper right hand corner.
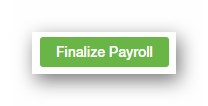
More information on the Payroll Report itself can be found by clicking here. For now, assuming everything looks good on your end, click the Finalize Payroll button found in the upper right hand corner.
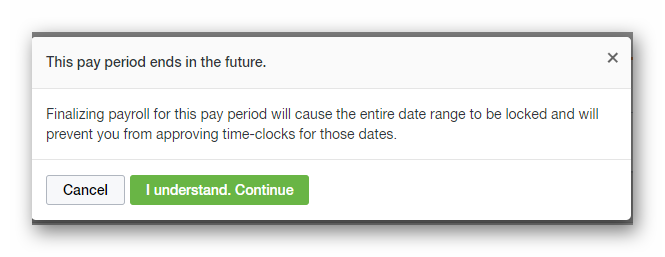
You may be presented with a warning when you click the Finalize Payroll button. The first warning indicated that (if) a pay period ends in the future, the Payroll Report will be locked. If you're attempting to finalize a Pay Period that ends in the future, you will be presented with a confirmation window. This is simply to ensure you understand that once the Pay Period has been finalized, you will be unable to approve Timesheets page entries for that date range. Click the I understand. Continue button when you're ready to move on.
The second warning, you may receive is indicates that there are Timesheets page entries pending approval. You can choose to be redirected to the Timesheets page to approve them, or you can ignore the warning, and continue with the finalization of payroll.

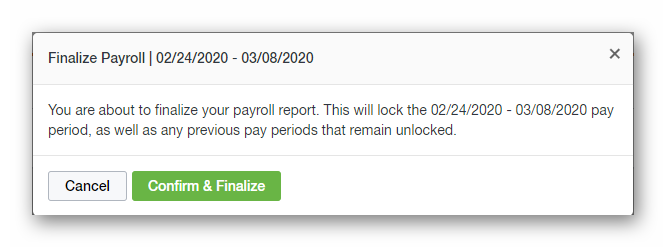
Once a Pay Period is finalized, the date range finalized will be locked, including date ranges in the past, preventing you from being able to approve Timesheets page entries for the date range. If you understand, click the Confirm & Finalize button.
Once the Pay Period has been finalized, you can navigate to the Timesheets page, filter by the date range of the finalized Pay Period, and see that the entries are indeed locked. This is indicated by the lock icons to the far left of the entries.

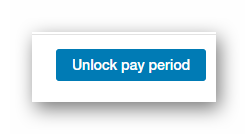
In the event that you find yourself requiring an adjustment for entries that have been locked due to a finalized Pay Period, you can unlock the entries, but only for the most recently finalized Pay Period. To do so, navigate back to the page where you created the Pay Period: Settings (gear icon) - Payroll - Pay Periods. In the upper right hand corner, you'll see the View History button. Click it.

The Pay Periods History will have a button in the upper right hand corner: Unlock Pay Period. Again, this will only unlock the most recently locked Pay Period.
__________________________________________________________________________________

We want to hear about your great ideas. If you have a feature request, enhancement suggestion, or improvement, let us know by submitting them to to our Ideas page. Your submission can receive votes from other Paycor Scheduling users, or you can vote on ideas yourself. Simply click the ADD A NEW IDEA button below to check it out.
Cheers!