- Via the Schedule page itself.
- Via the Schedule tab of the main navigation menu.
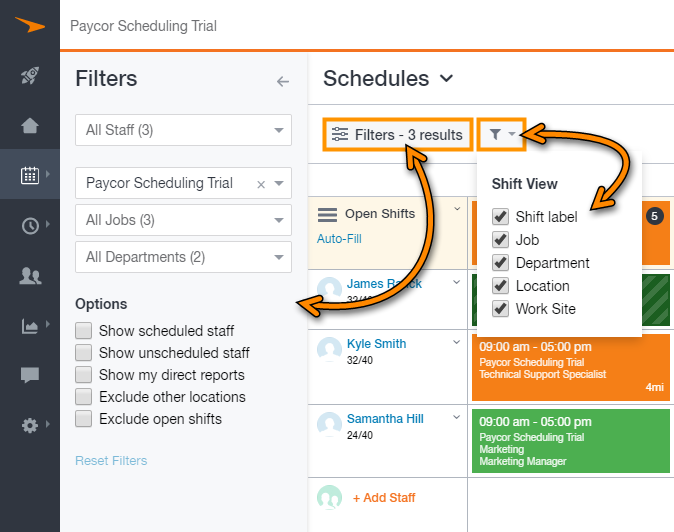
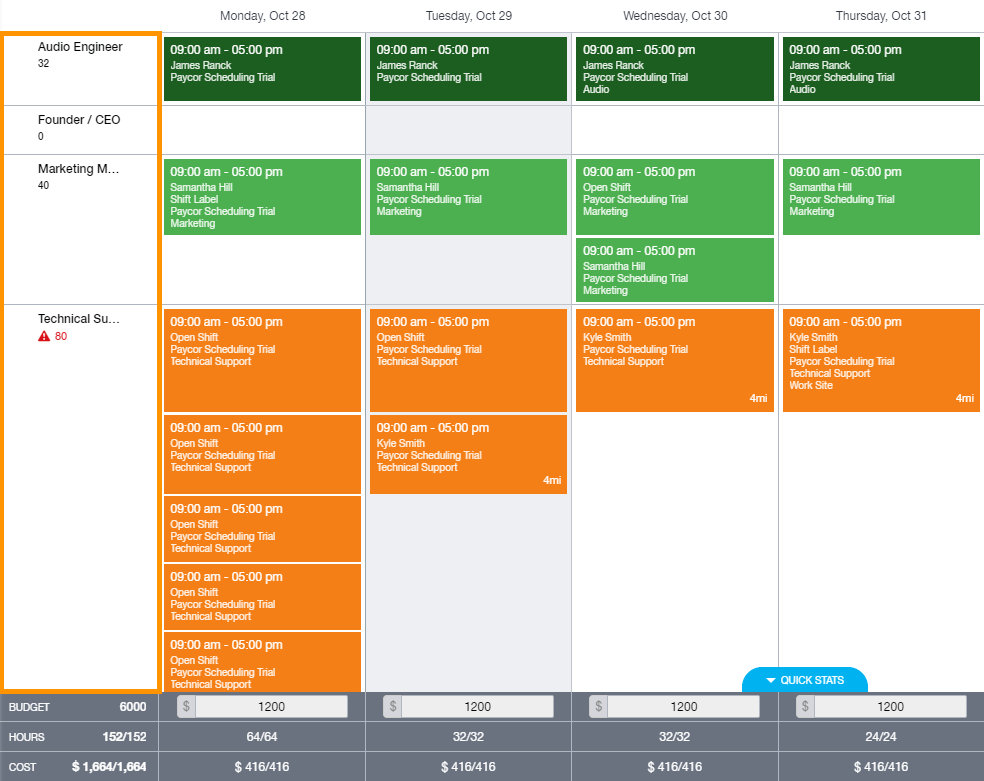
Right below the Schedule page sub menu, you’ll notice a couple of filter buttons. The main filter button will open up a new menu on the left hand side of the Schedule page. You can filter by:
- STAFF
- LOCATION

- JOB
- DEPARTMENT
- Show Scheduled Staff will only display staff members via the scheduling grid that have shifts currently assigned.
- Show Unscheduled Staff will only display staff members that do not currently have any shifts assigned via the scheduling grid.
- Show My Direct Reports will only display staff members that are being supervised by the individual enabling the filter option.
- Exclude Other Locations will hide any locations from the scheduling grid that do not relate to any of the other filtering options currently in place.
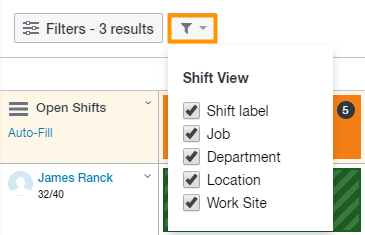
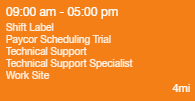
- Exclude Open Shifts will hide any available open shifts from the scheduling grid. Additionally, the second filter button, as seen in the images below, affects the shifts themselves. Once enabled, more information will be displayed directly on the shifts.

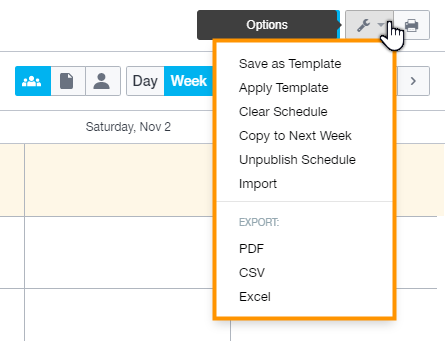
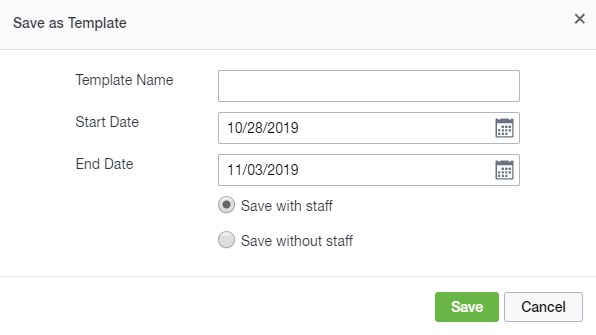
- SAVE AS TEMPLATE

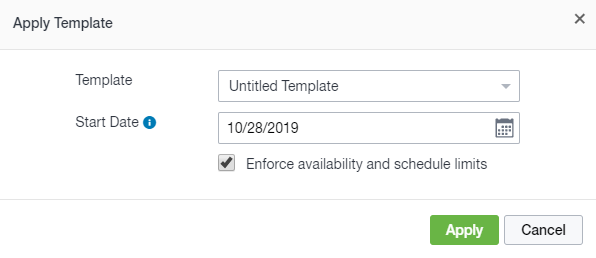
- APPLY TEMPLATE
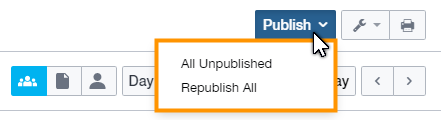
UNPUBLISH SCHEDULE

Directly below the Print button, you'll see the navigation buttons. These buttons will allow you to navigate the scheduling grid from day to day, week to week, and month to month.

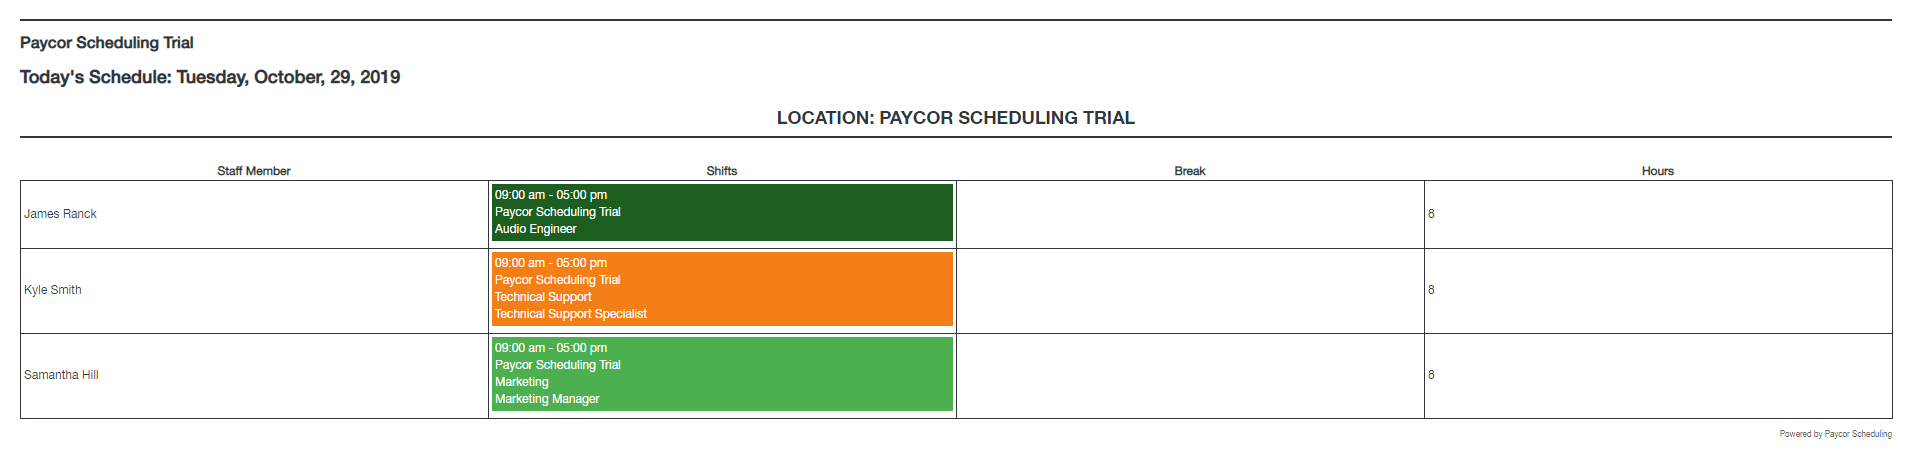
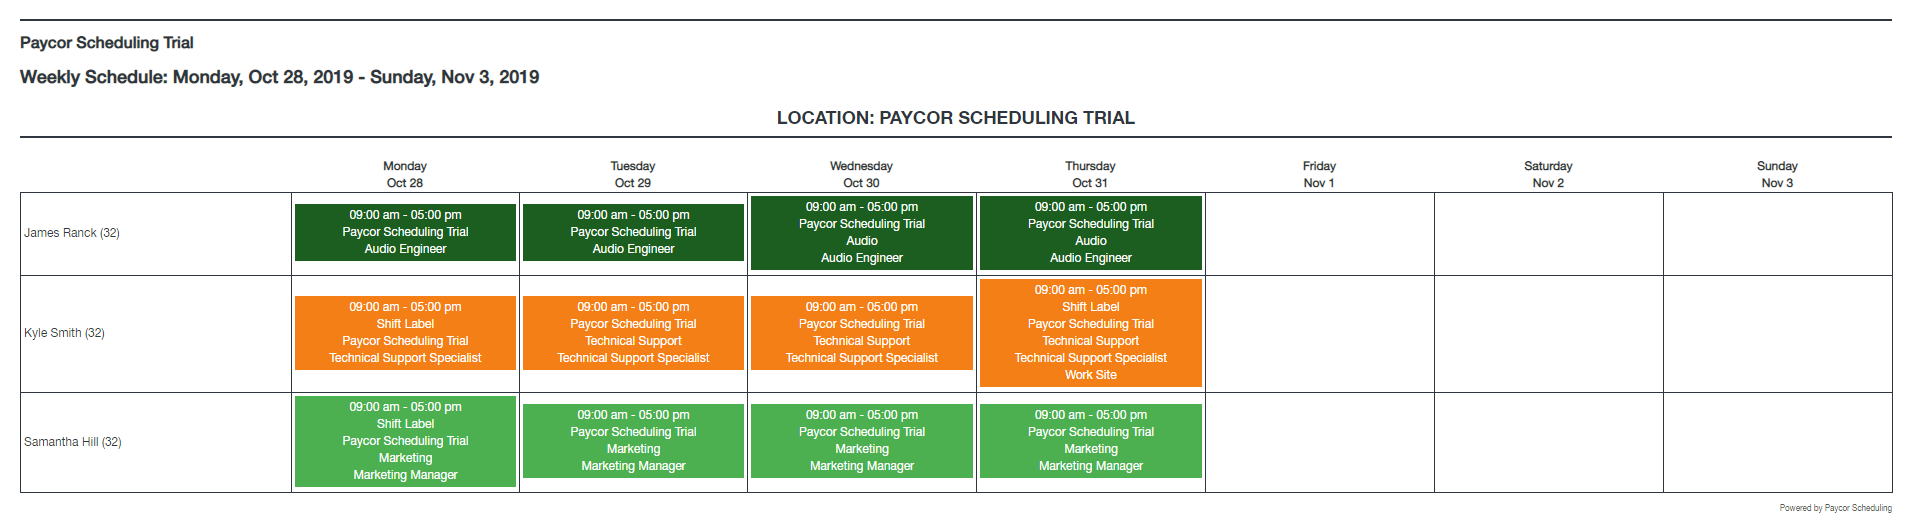
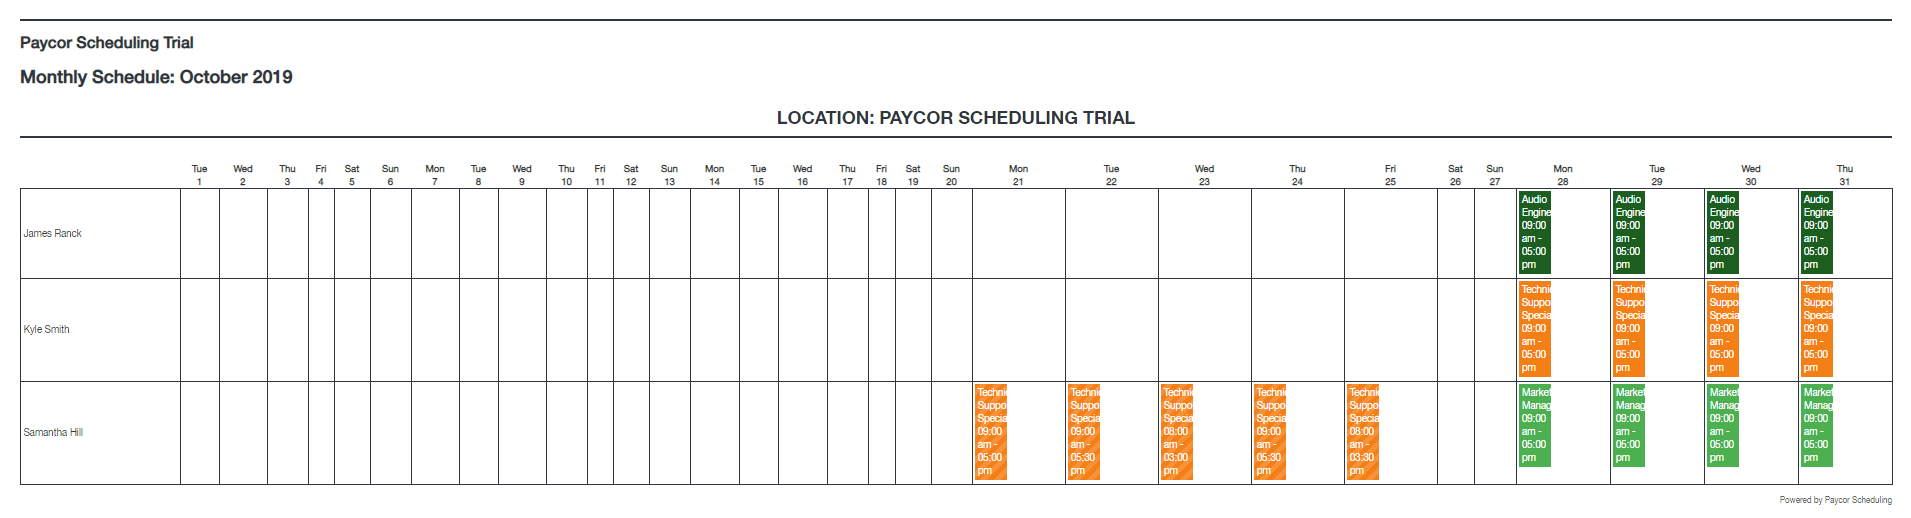
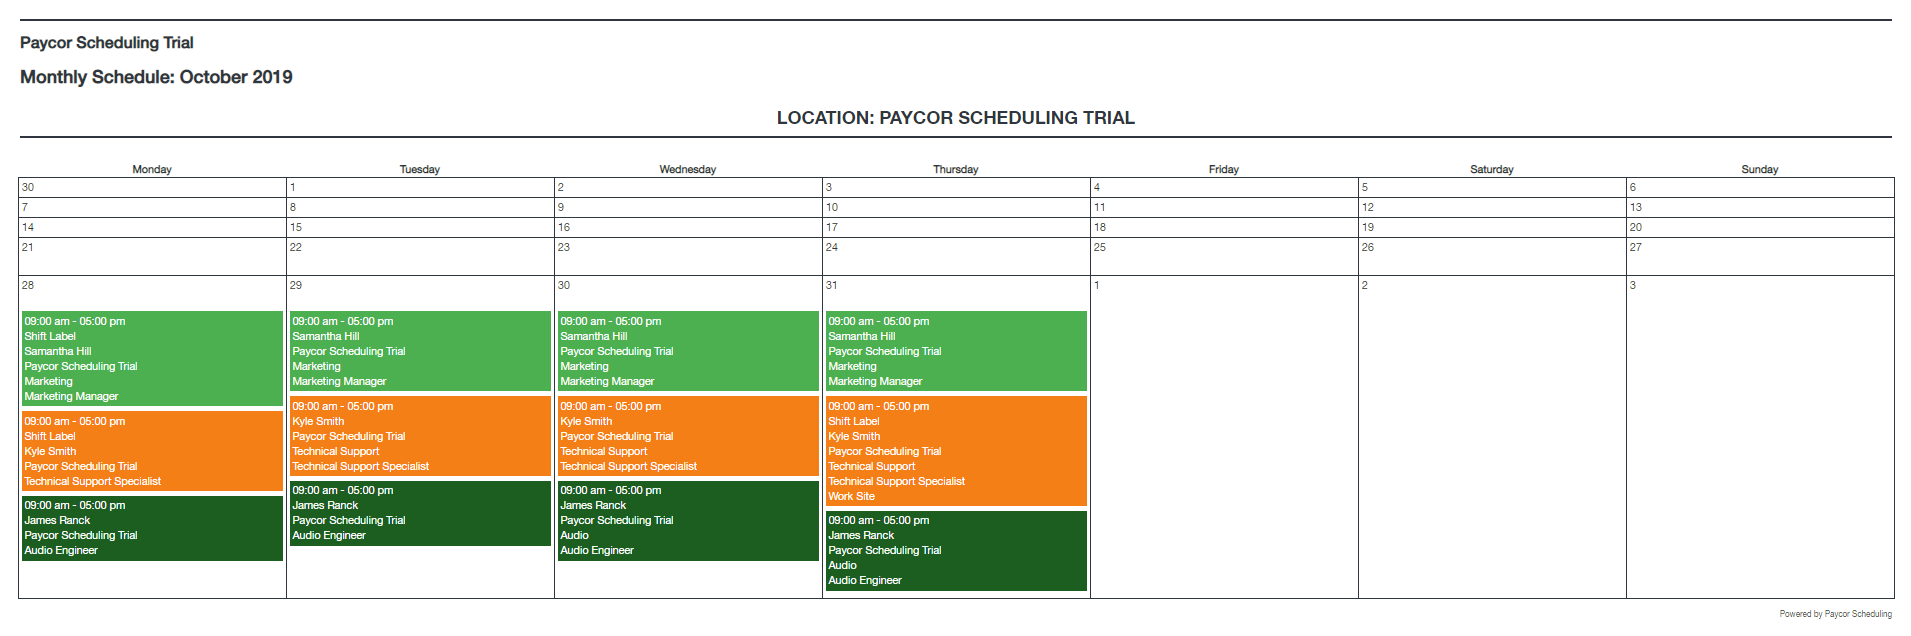
By clicking on the Day, Week, and / or Month buttons, you can switch between the Day, Week, and Month views of the scheduling grid. The Today button will revert the schedule back to today's current date. For example, if you're creating a schedule two weeks in advance, the Today button will send you back to the current week. The arrow buttons allow you to easily navigate through the different days, weeks, and months of the schedule.
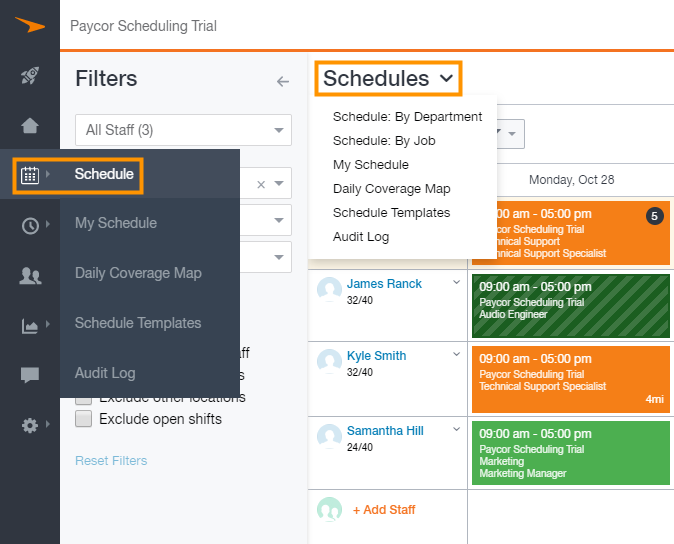
The Schedules drop down menu will display additional scheduling related pages.
- SCHEDULE: BY DEPARTMENT

- SCHEDULE: BY JOB
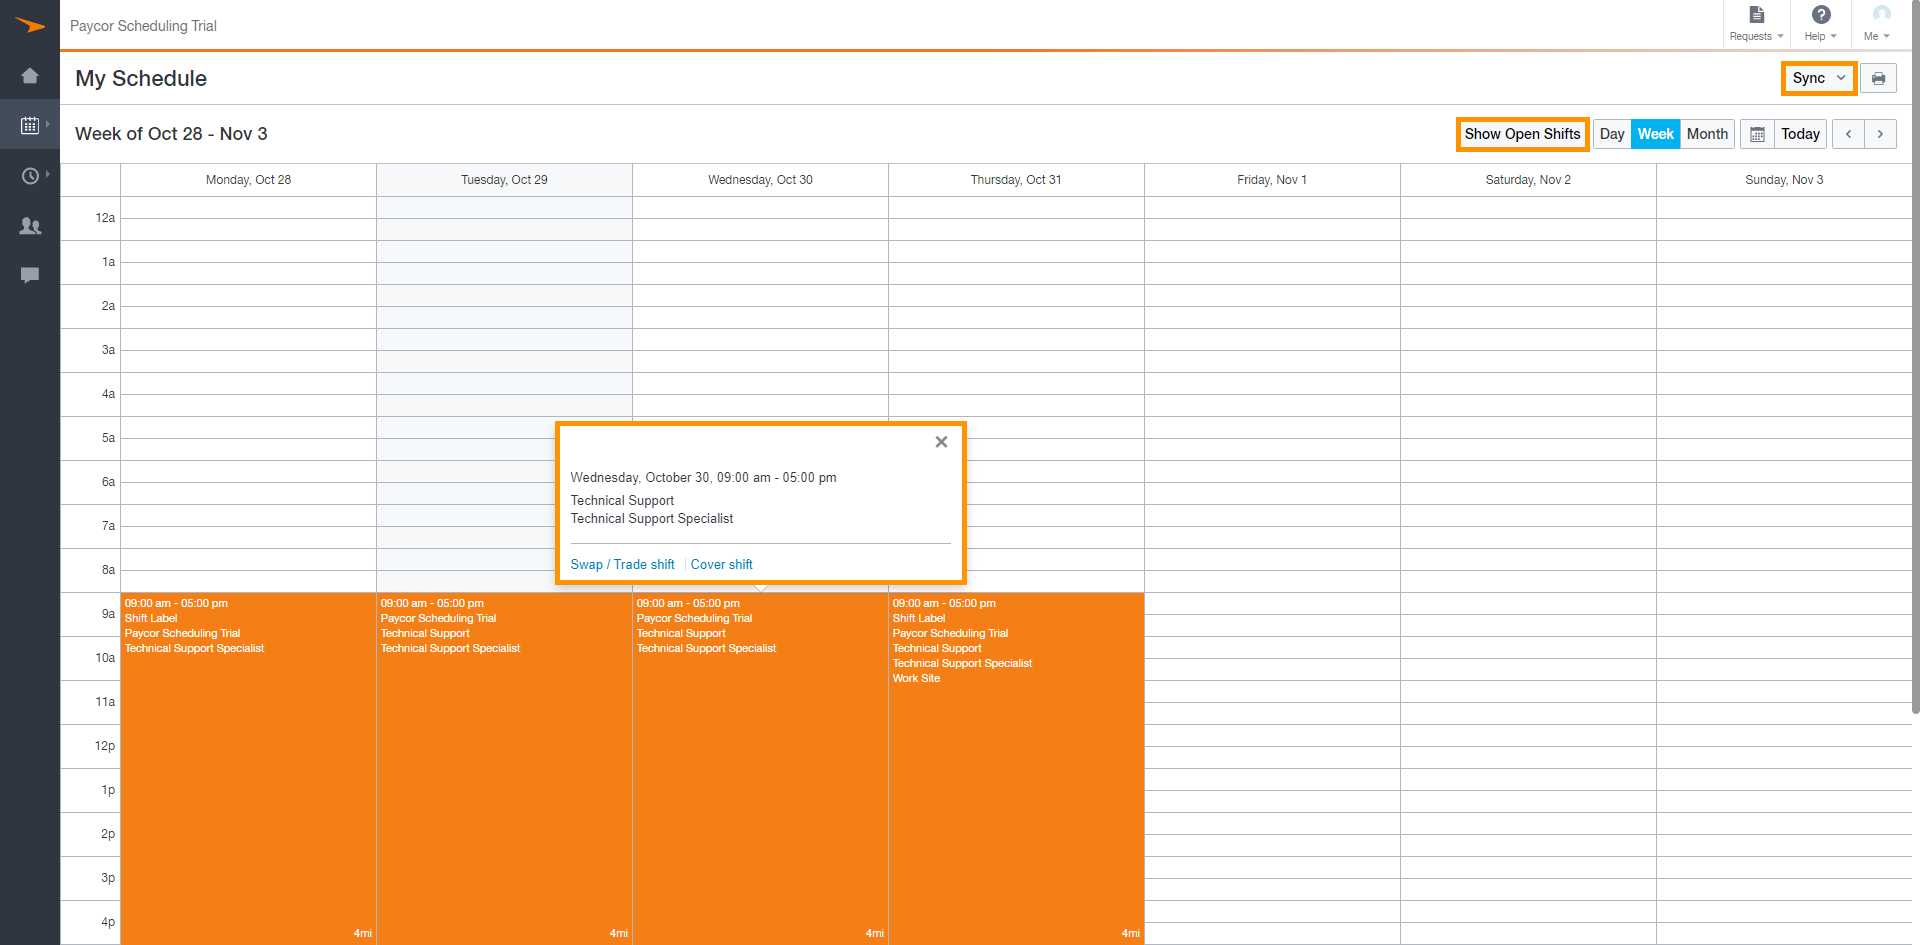
- MY SCHEDULE
This is the personal schedule page for the staff member that's viewing it. The My Schedule page is similar to the Schedule page, and can be viewed by the Day, Week, and / or Month. You're also able to view any available open shifts by clicking the Show Open Shifts button. Depending on how the Paycor Scheduling account has been set up, clicking any scheduled shifts will display more information, and allow for trading, coverage, etc. Finally, the Sync button allows you to sync your My Schedule page with either Google Calendar, or Outlook.
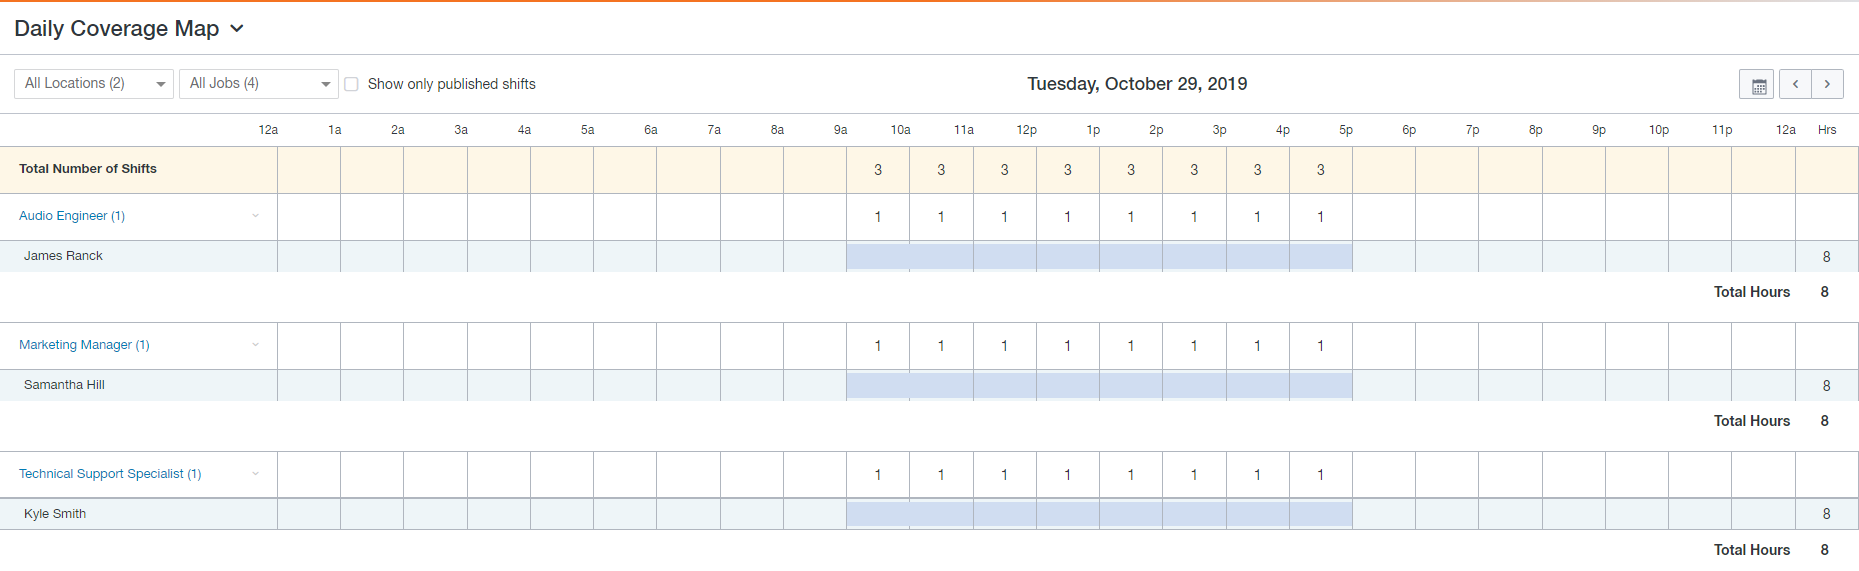
- DAILY COVERAGE MAP
This page will display a daily grid of all jobs / locations, or an individual Job / Location, which is divided into an hourly basis. This will help reduce the amount of gaps in coverage.
- SCHEDULE TEMPLATES
We covered saving / applying templates above, but this will take you directly to the Schedule Templates page where you can create a new template from scratch, edit an existing template, or delete unneeded templates.
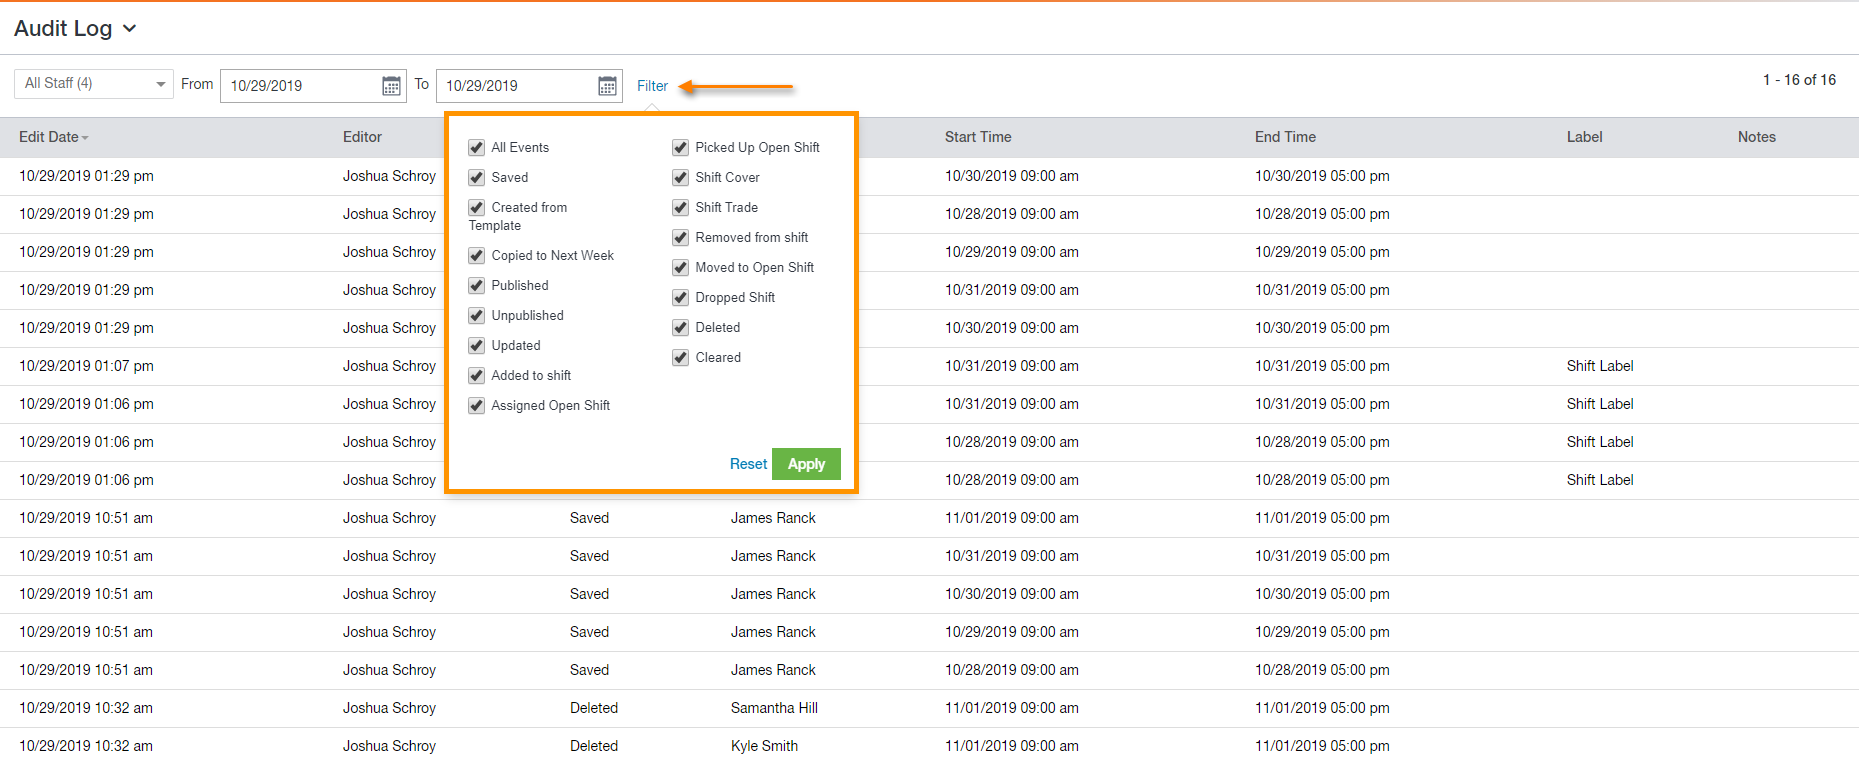
- AUDIT LOG
There's an Audit Log for the Schedule module, as well as the Time Tracking module. Each one has different information to be displayed, as well as different filters to enable. The Audit Log will display the events that take place for each staff member. For example, below are some of the actions that can be reviewed:
- Created From Template
- Deleted
- Cleared
- Saved
- Published
- Updated
__________________________________________________________________________________

We want to hear about your great ideas. If you have a feature request, enhancement suggestion, or improvement, let us know by submitting them to to our Ideas page. Your submission can receive votes from other Paycor Scheduling users, or you can vote on ideas yourself. Simply click the ADD A NEW IDEA button below to check it out.
Cheers!