
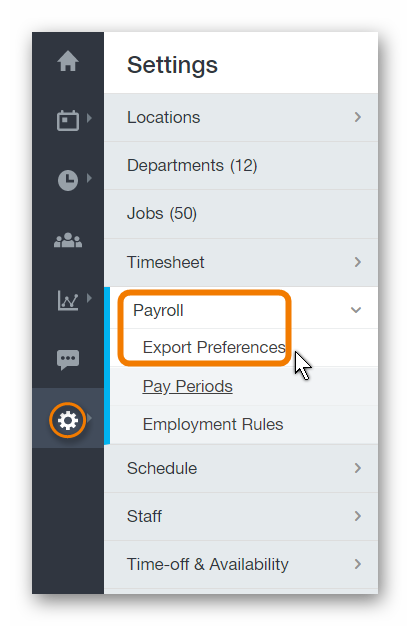
Paycor Scheduling offers an alternative to the standard QuickBooks Desktop integration, and that's exporting payroll data in a QuickBooks Desktop supported format. In order to configure the export, you'll want to navigate the account in this order:
- Settings (gear icon).
- Payroll.
- Export Preferences.
Next, select QuickBooks Desktop from the Export To... field. Once you do this, you'll be presented with a number of configurable fields.
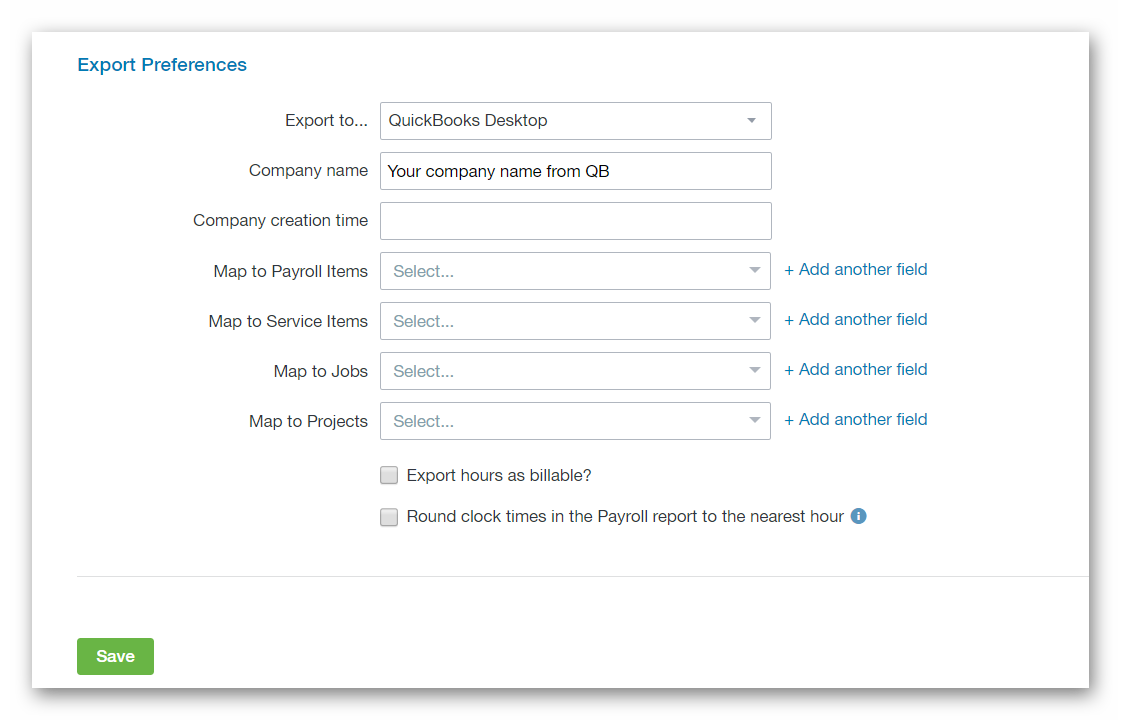
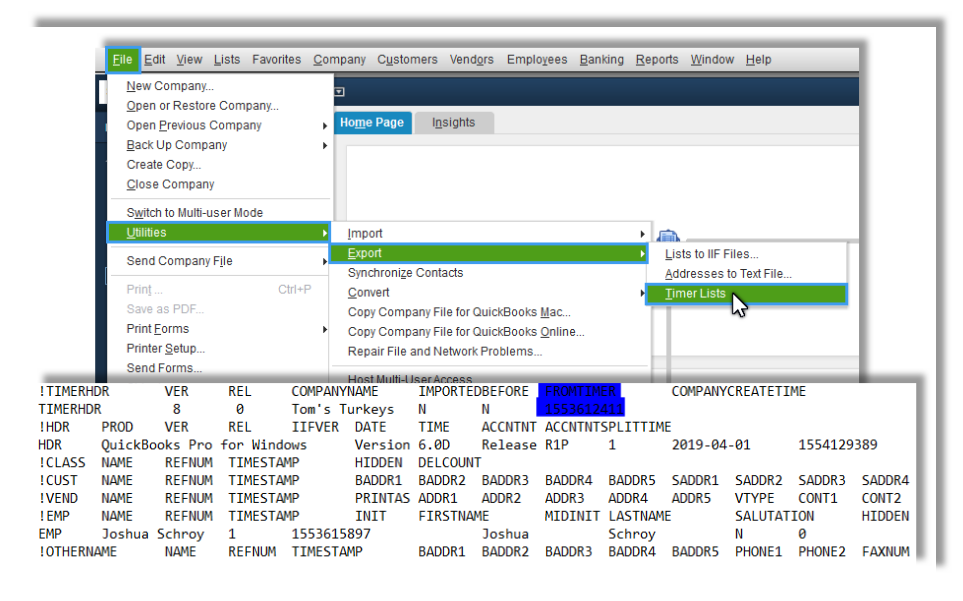
The Company Name field requires the Company Name as seen within your QuicBooks Desktop account. The Company Creation Time can be achieved in the following way:
- Access your QuickBooks Desktop account.
- Navigate to File - Utilities - Export - Timer Lists.
- Export the Timer Lists file.
- Open the Timer Lists file using a text editor (Notepad).
- Locate the Company Creation Time (FROMTIMER).
If you're mapping any data to the Pay Codes option, ensure that Pay Codes are enabled within the Paycor Scheduling account, and properly configured before processing payroll. Once everything is ready to go, click the Save button at the bottom of the Export Preferences page so the changes can take effect, then head over to the Payroll Report page. Once the Payroll Report is generated within Paycor Scheduling, click the down arrow in the upper right hand corner, and select Export To QuickBooks Desktop.
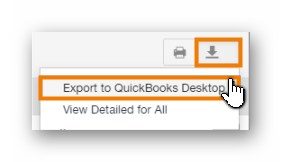
You will now be able to save the file to your drive, and import the file to your QuickBooks Desktop account. Once the file is imported, and the data is verified, payroll can now be processed.