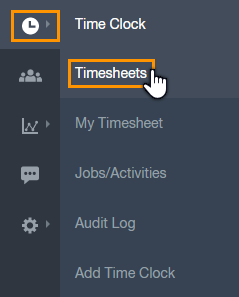
Welcome to an overview of the Timesheets page. Whether you're an expert of Paycor Scheduling's scheduling & time Tracking tool, or just starting out, this guide will help get you started, or refresh your memory on how things work. To access the Timesheets page, hover over the clock icon, located on the left side of the account (main navigation menu), and click the Timesheets button.
Once you land on the Timesheets page, you'll notice that the data is split up into columns, and rows. Let's start at the top, and work our way down. First up is filters.
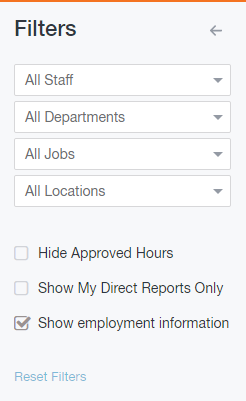
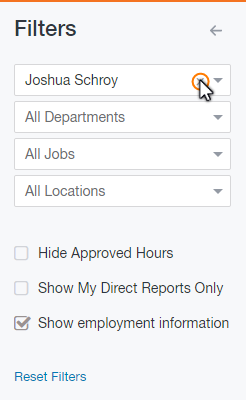
When reviewing Time Clock entries, it may be a bit chaotic attempting to manage all staff members at once, so let's narrow it down. You're able to filter by All Staff, or a specific staff member, which focuses on one person, only showing their respective Time Clock data. When you're ready to view all staff members again, just click the "x" on the far right of the field.
The next three filters, Departments, Jobs, and Schedule Groups work in a similar way, but this will only show Time Clock entries that have the chosen Department, Job, and / or Location assigned. Also, keep in mind that the Staff, Departments, Jobs, and Schedule Group filters can work together to really maximize your efficiency when reviewing Time Clock entries.

-
Hide Approved Hours
- Hiding approved hours does exactly that, and removes any approved Time Clock entries from the Timesheets page view so you can focus on approving Pending entries.
-
Show My Direct Reports Only
- Direct reports are based on the Supervises column within the Profile Details page of a staff member. For example, if staff member A is supervising staff member B, and staff member C, and the Show My Direct Reports Only option is selected, staff member A would be able to focus on those two staff members because they're a part of his / her direct reporting.
-
Show Employment Information
- If this filter is selected, the Job, Department, and Location columns will be visible when editing Time Clock entries. Otherwise, it will remain hidden.
-
Reset Filters
- This will reset all filters back to default.
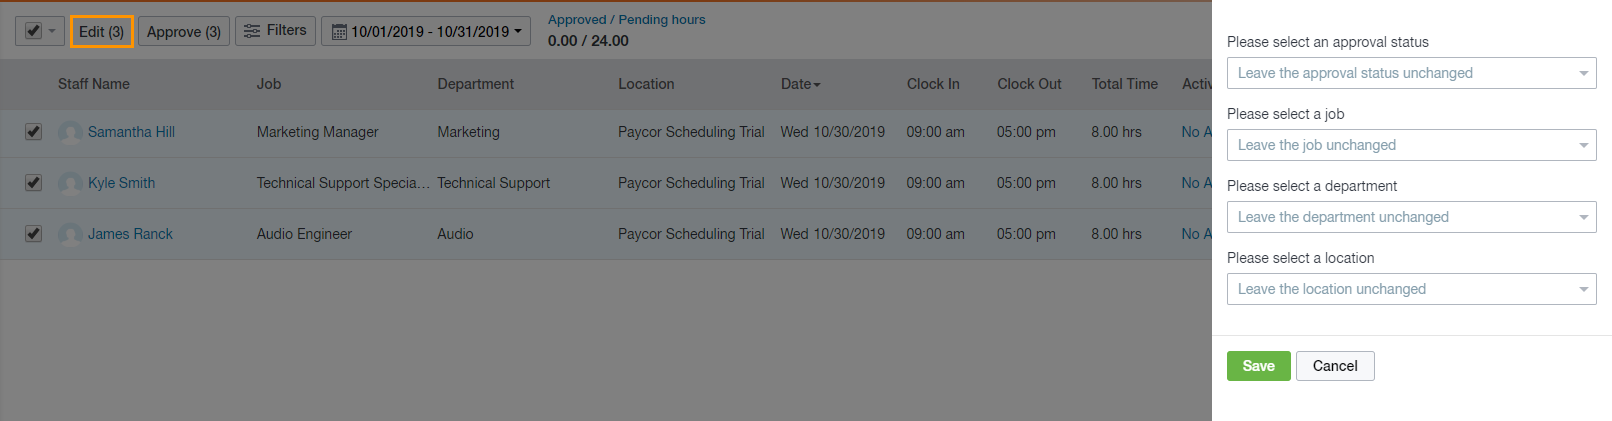
You can mass select All, None, Approved, or Un-Approved Time Clock entries by clicking the down arrow on the selection box.

Once you do so, two additional options will appear, allowing you to either approve any pending entries, or open up the Mass Edit panel which includes four changes that can apply to all of the entries you have selected.
To hide the Filters menu, click the Filters button.

You can view the Timesheets page entries date range by selecting one of a few different predefined date options, or select a Custom date range in calendar format.
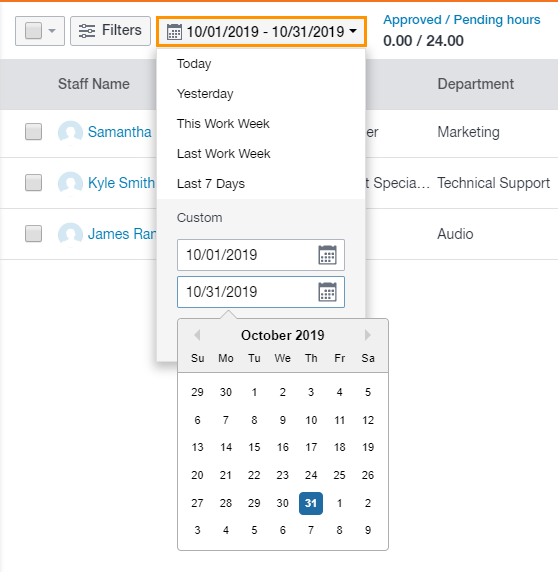
To the right of the date range filter is the Approved / Pending Hours counter. This is a quick way to determine how many hours have yet to be approved, and how many hours staff members have been approved for.

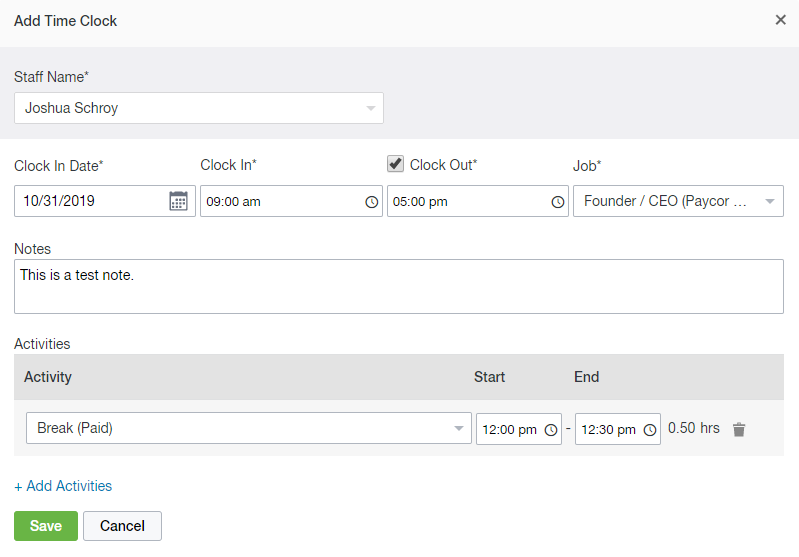
For a number of reasons, you'll need to add a brand new Time Clock entry. To quickly do so, click the Add Time button.

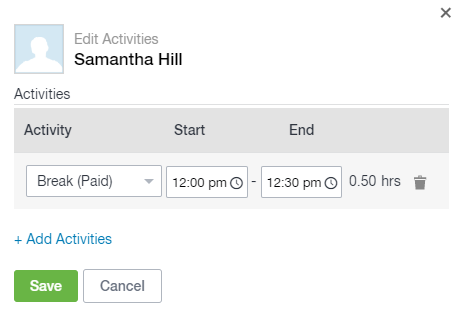
This will open up a new panel that will ask for the staff member name, date of the clock in, clock in time, clock out time if necessary (leave this deselected if the staff member should remain clocked in), and the Job. Additionally, you can add a note, and activities. For more information on Jobs / Activities, please click here.
The three dots located on the far right side of the Timesheets page will drop down a list of options to choose from:
-
Approve All
- This is the quickest way to approve all Time Clock entries.
-
Export
- CSV
-
Excel
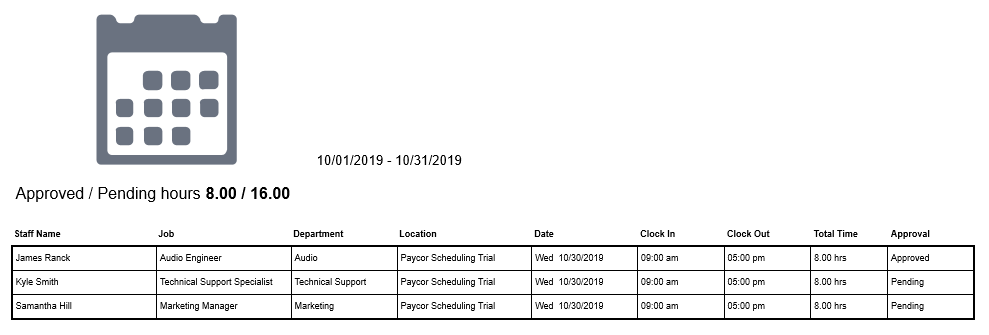
- This will export the raw Timesheets page data into one of the three available formats. Please see an example of the export below.


-
Print
- This will allow you to print off the raw Timesheets page data. Please see an example of the print format below.
-
Import
-
From Schedule
- Assuming you have included the Scheduling module in your Paycor Scheduling subscription, you can import raw shift data from the Schedule page, and convert said data to Time Clock entries. The entries will then require approval.
-
From Schedule
To edit a single Time Clock entry, simply click the pencil icon. To delete it, click the trash can icon.

>>> Please be careful when deleting Timesheets page entries. Once a Time Clock entry has been deleted, you will not be able to recover it. There's no undo button! <<<
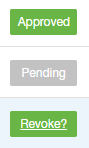
Clicking the Pending button will approve a Time Clock entry. Hovering over an approved entry will allow you to revoke it, and convert it back to a Pending entry.
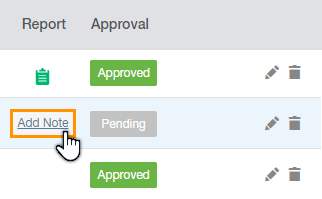
Click the note icons to view any available shift reports. Click the Add Note button to add a Shift Report.
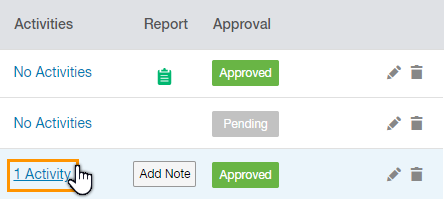
Click the No Activities button to add a Job / Activity, or if there are existing activities, you can make adjustments to them.
Again, you can inline edit Time Clock entries by clicking the pencil icon, but always remember that you can edit the entries in Advanced Mode by clicking the Advanced button.

This will not only allow you to prefer Advanced Mode be open each time you edit a Time Clock entry, but also open up a panel that's similar to when you're adding a Time Clock entry manually.

__________________________________________________________________________________

We want to hear about your great ideas. If you have a feature request, enhancement suggestion, or improvement, let us know by submitting them to to our Ideas page. Your submission can receive votes from other Paycor Scheduling users, or you can vote on ideas yourself. Simply click the ADD A NEW IDEA button below to check it out.
Cheers!