Please note: This article only applies to standalone customers. This article does not apply to those who are integrated into the broader Paycor HCM platform.
Customers who are integrated with Paycor's HCM will automatically have their network and teams set up when the feature is activated. Any changes will automatically flow through to the Talent Development app.
Inviting Teammates
After getting the platform set up, it's time to invite your team!
Make sure you select the options that are right for your process: You can do this here.
Inviting Teammates From the People Page
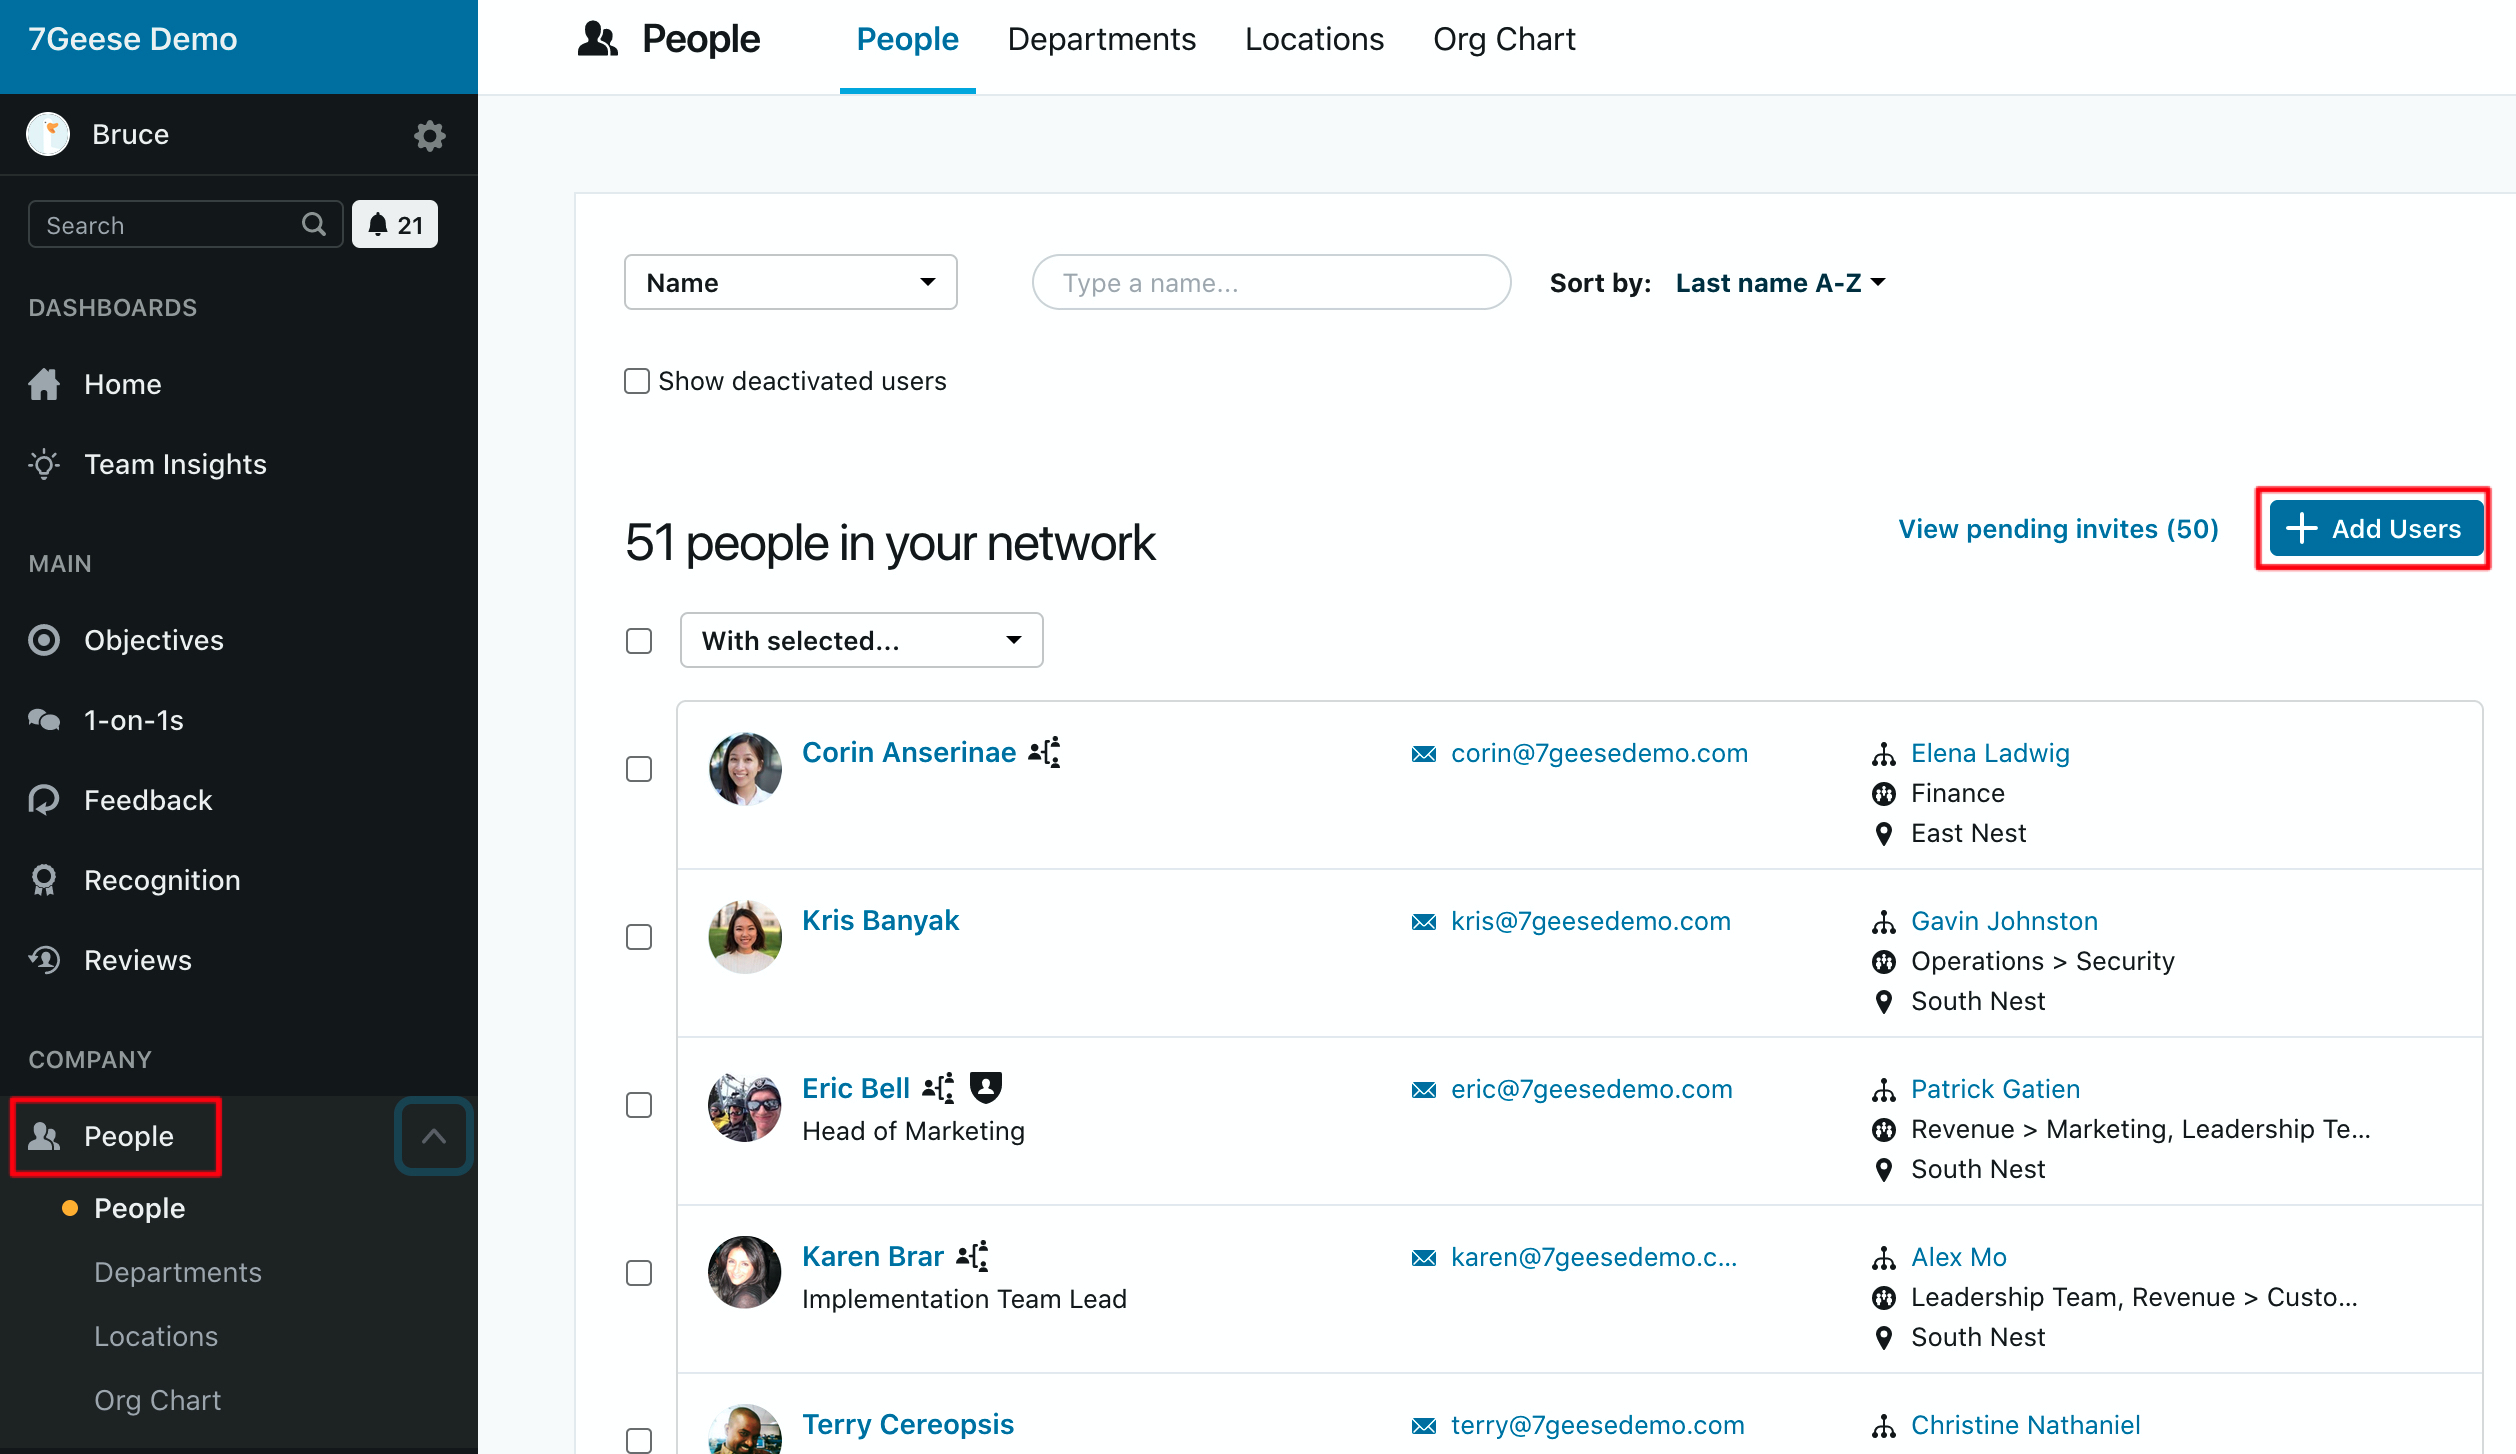
To invite a colleague head over to the People page in-app and click Add Users.
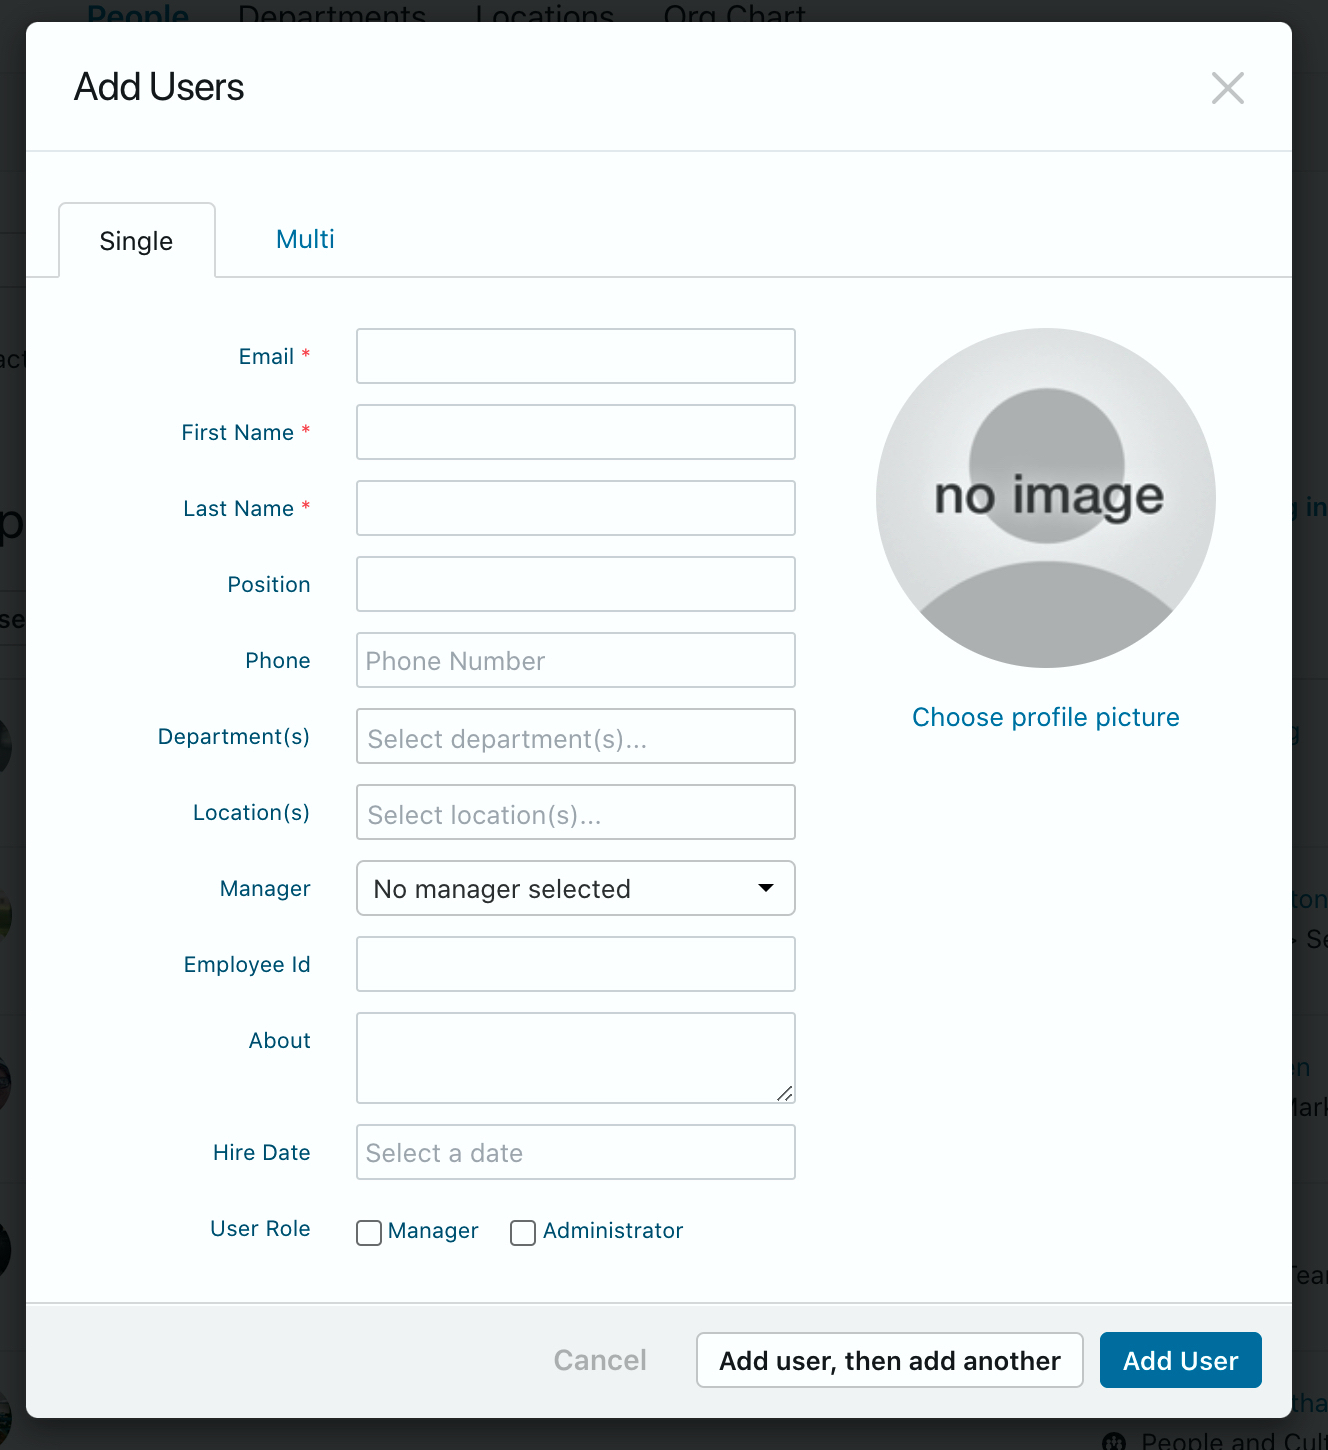
From here, fill out the proper info in the pop-up window
Inviting Teammates via Batch Invite
Getting started can be overwhelming, we understand you. If you'd like to invite a batch of team members at once, use our bulk invite feature.
As an administrator, you are able to access Organization Settings. Here you are able to update the platform at a global level.
Using the Batch Invite feature, you can upload a .CSV file containing employee's profile information en-bulk. This also allows you to populate the platform with ghost users until they register. This ensures your objectives can have owners and your org chart can be organized even prior to rolling out 7Geese to the rest of your team.
Prepping Your .CSV file
If you're unfamiliar with working with the .CSV extension: it is a plain text file with a list of data. Each new line in a .csv file creates a new record when you upload.
The batch import feature allows you to import the following user profile information en mass, without having to individually invite employees via the People tab. You can upload:
Required
- First name
- Last name
- Employee's e-mail
- Their position/role in the organization
Optional
- Phone number
- The email of the employee's manager
- What department(s) [including sub- dept's] they work in
- The employee ID number
Your .csv file must follow this order of information to be uploaded correctly. If there's an optional column that you won't be filling out, the column must remain empty in the spreadsheet.
Important Notes About Prepping Your . CSV
- To add an employee to multiple departments you separate what departments they belong to with a semicolon ";"
- For sub-departments, use ">" to indicate the department they are under is inside a larger department
- For example, Susy is the Inside Sales Manager in the Sales Department, as well as the Internship Coach. Below is how you would input Susy's information into your
.CSVfile Sales>Inside Sales;Internship Dept- The manager's email is used to build the organizational chart
Example .CSV Files
In all the below examples we have a 5-person organization ** Bold text indicates required information
Notepad, Word, Pages, or any form of a Text Editor

Since CSV stands for comma-separated values, you are able to use any form of text writer to generate a list of employees for bulk importation using commas to separate each of the required and optional a .csv file by hand following the format shown above. Save your file with a .csv extension instead of .txt.
Via Any Form of Spreadsheet Tool
Be sure to follow the same order as you go across the row. You will begin in Column A with the employee's first name, ending in Column H with their employee ID. For any optional fields that are unknown be sure to leave them blank. When saving be sure to change the file extension to .CSV
Getting Your Data Imported
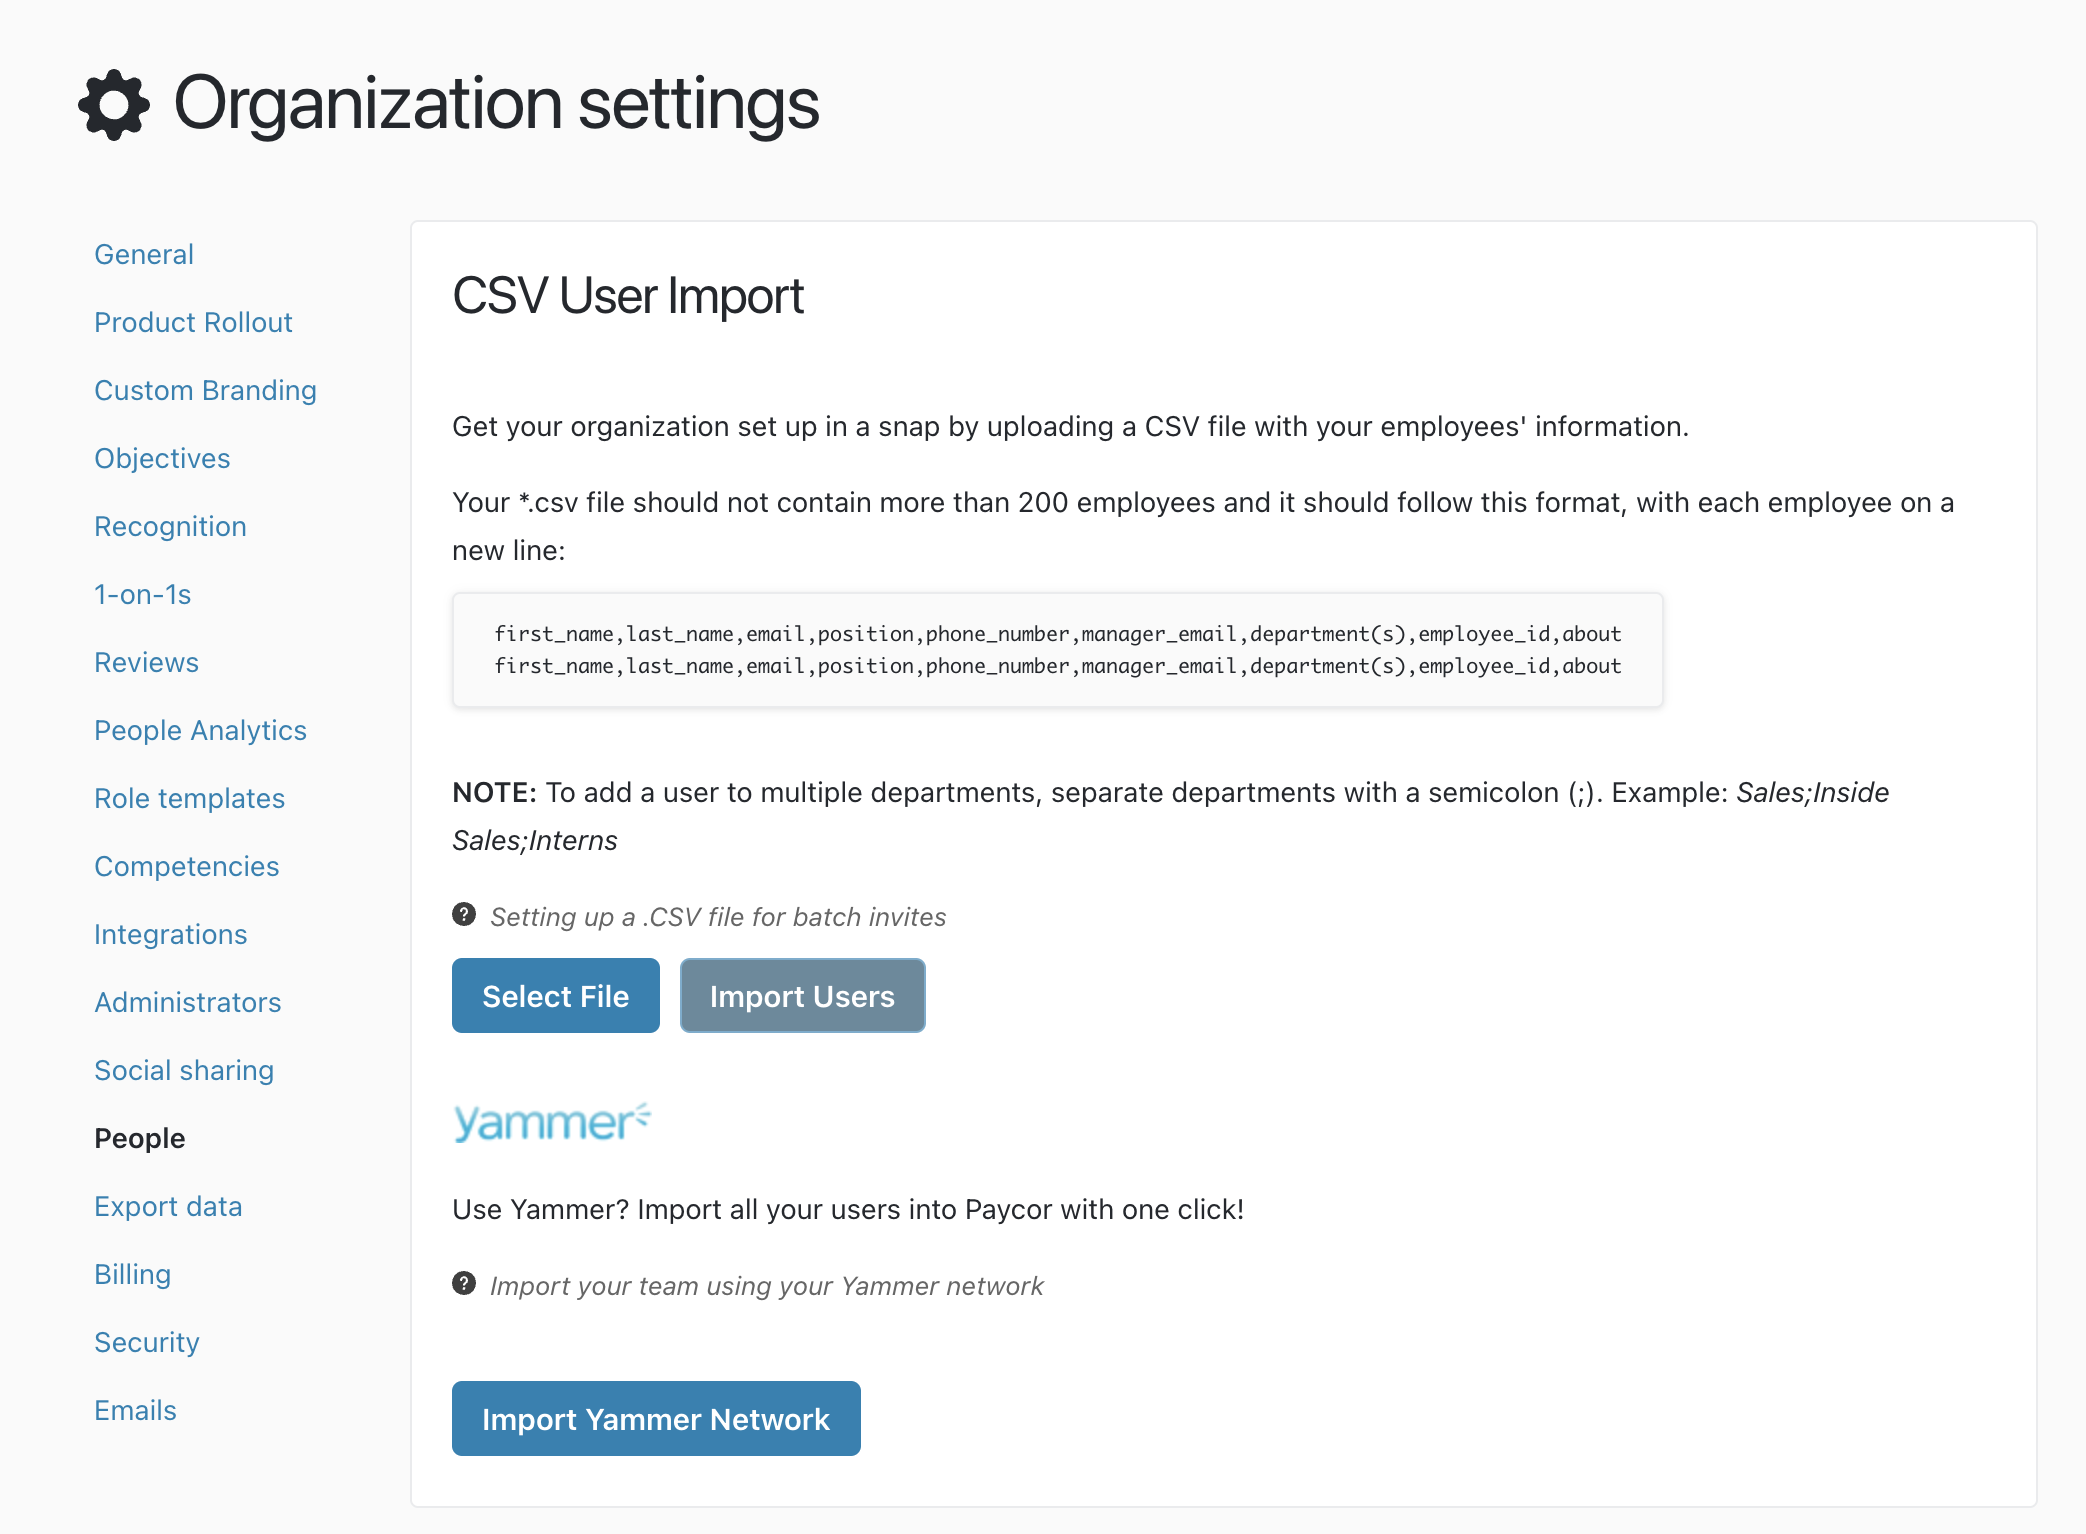
Once you have your CSV file, head to your 7Geese/Paycor Organization Settings. To find these settings click on the settings icon next to your name on the top right of the platform. Next, click on Batch Invite on the sub-navigation. From here, simply upload your prepared .CSV and select Import Users.
Here's a visual of what Batch Invite looks like under the organization settings area.
Resending Invitations
In case someone missed the first invitation, admins can resend invitations individually or in bulk. In the People tab, Click on Pending invitations.

Click Resend all invitations or find the individuals you want to resend the invitation to and click on Resend invitation next to their name.

User Management Tools
As an administrator, you can use the People Section to make bulk changes to reporting managers, departments, employee IDs, and other small changes that will save you time as you manage your network. Employees can come here or visit the org chart to see who is on what team, and how their departments fit within the grand scheme of the organization, or, as use this page as a quick reference for contact information.
There are various filters that have been added, including:
- Editing reporting managers
- Creating and assigned sub-departments and departments
- Adding users one-by-one, or en-bulk
- Making someone a platform administrator
- Deactivation and reactivation of accounts
- Add employee IDs
- Edit phone numbers, titles, or reporting managers
Making someone an admin or manager
To assign manager or administrator permissions to a teammate, head to the People section of the app.
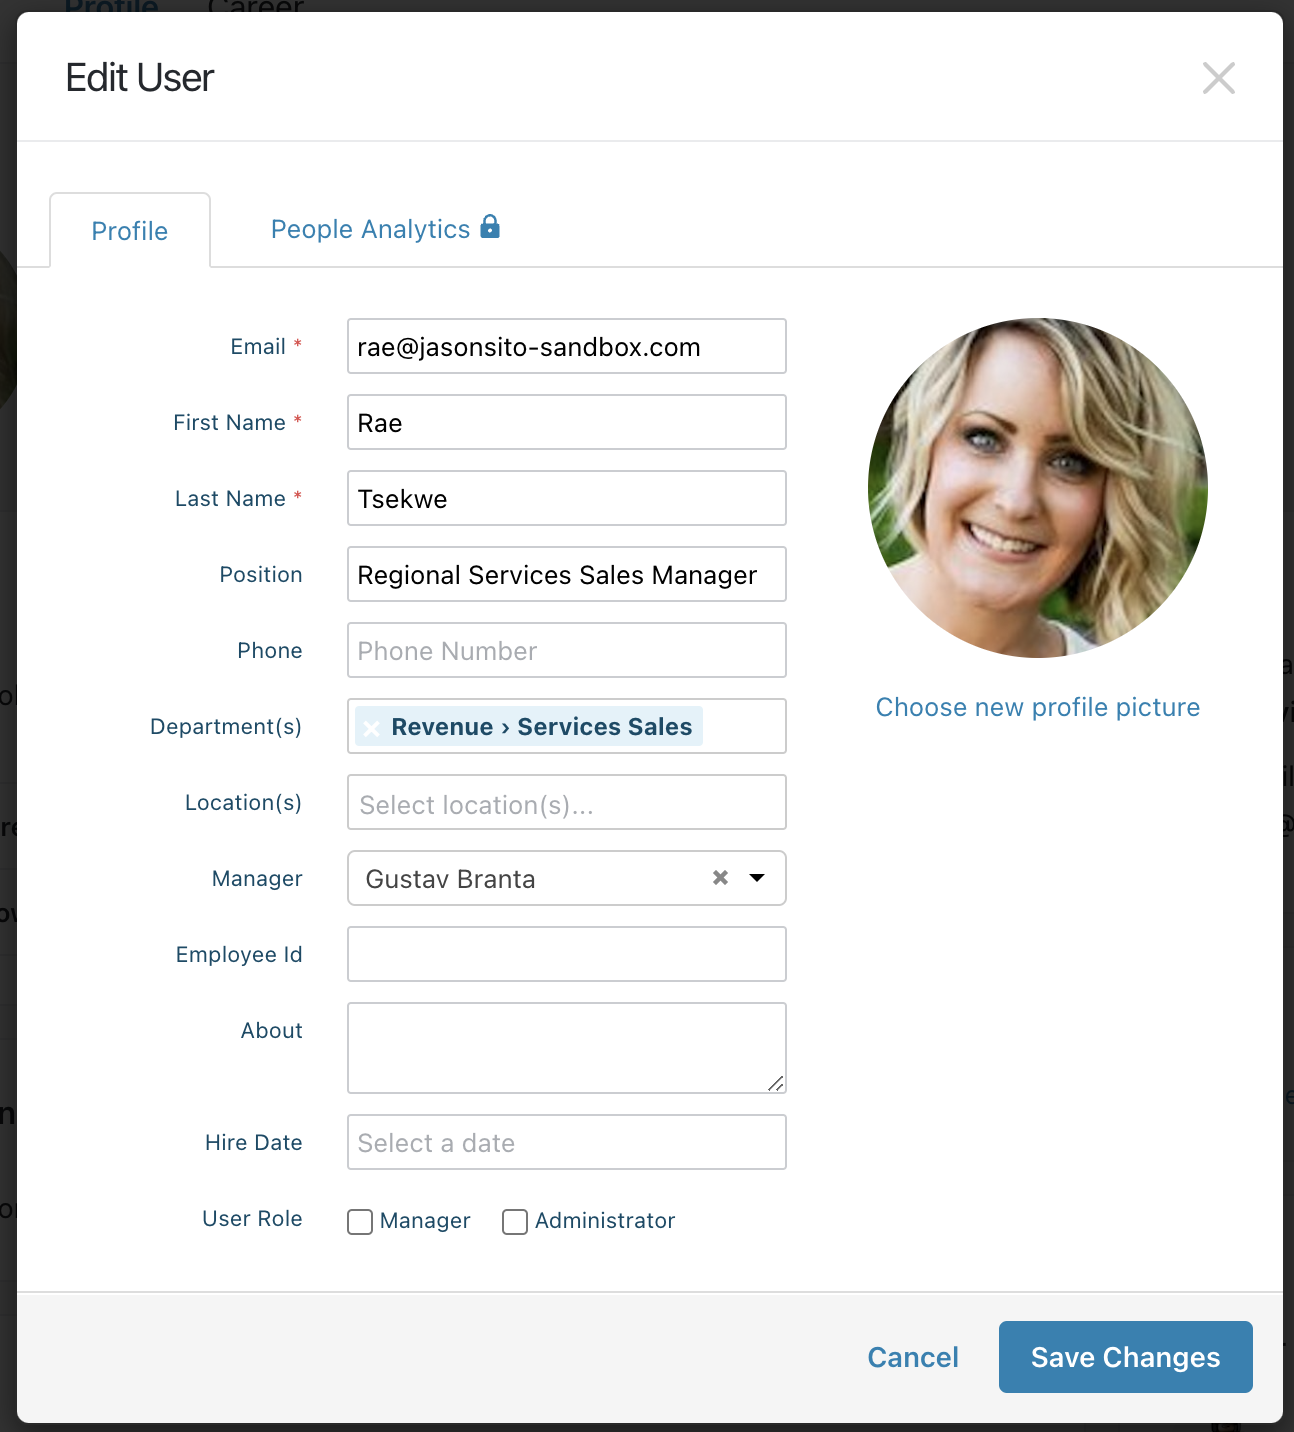
From there, hover over the individual you'd like to change permissions for, and from the drop-down on the right, select edit user.
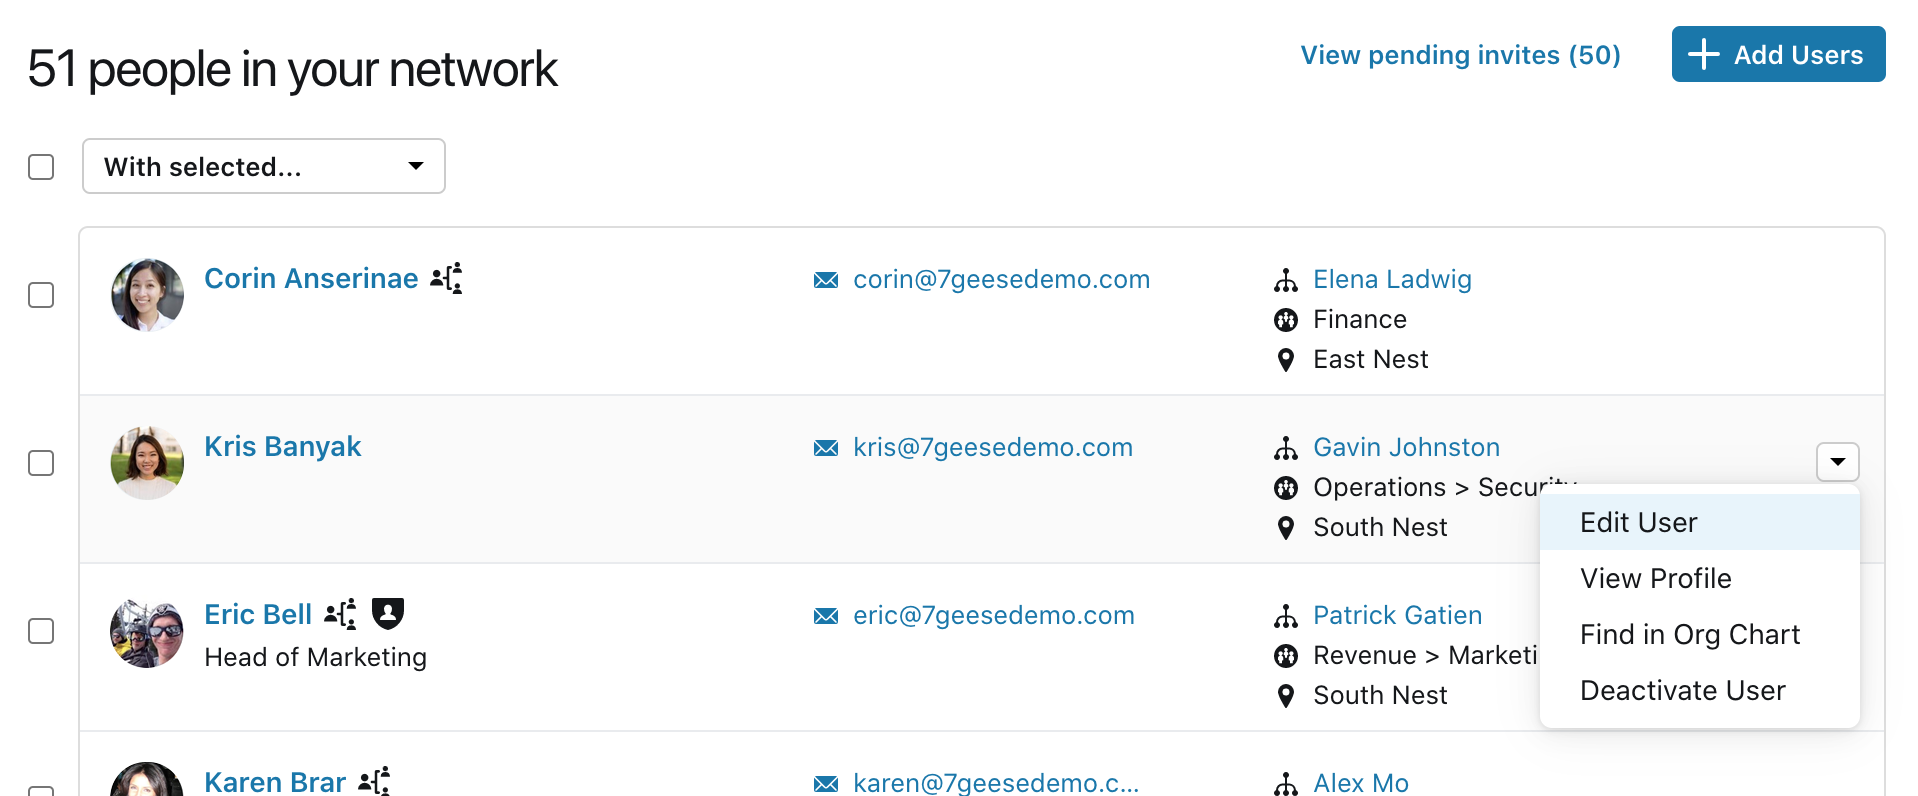
In the profile dialog, there will be two options for permissions at the bottom. Select the appropriate label and save your changes.
Creating Departments
Get your department structure set up before adding people, or add new departments to existing departments as changes take place.
Adding a New and Editing Existing Department(s)
Manage or add new departments via the People > Departments section.
Add new departments by clicking the New Department button.

Alternatively, hover over existing departments and access the edit or create sub-department option via the drop-down menu located to the right of any existing department.

Add additional members to the department or select a parent department if you need your department to be a sub-department.
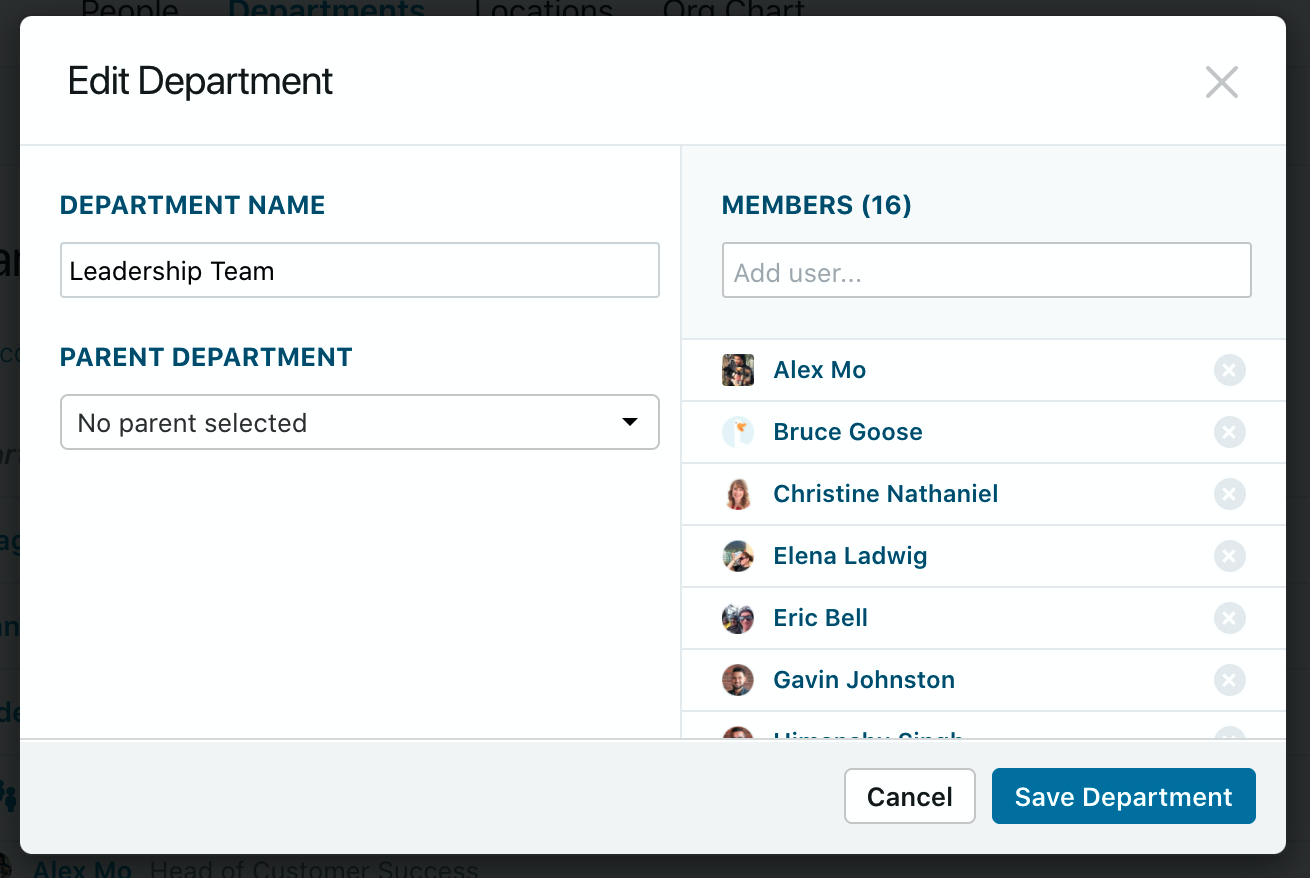
Note: By default, we set up permissions for managers and administrators to manage and create departments. To make this change visit: Organization Settings > General > Editing Departments.
Org Chart
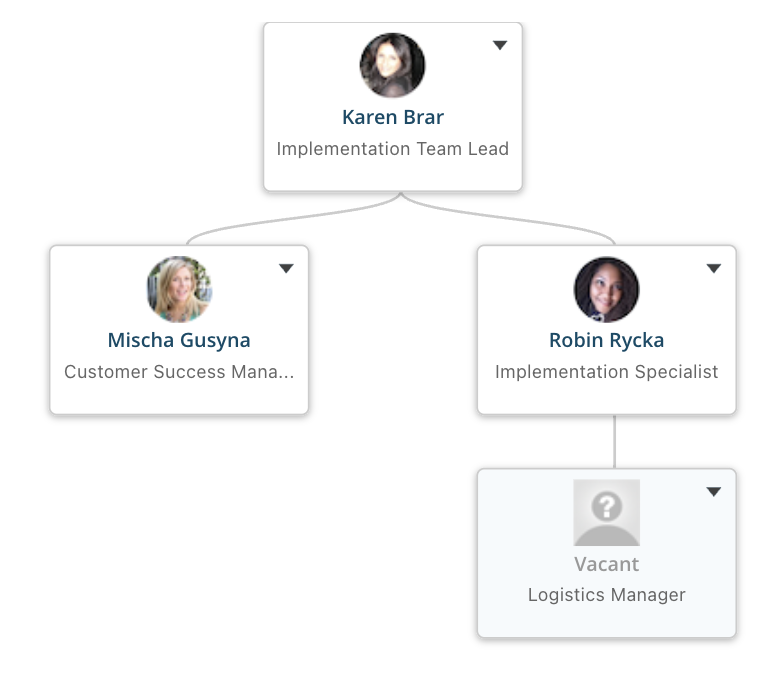
Paycor's Talent Development standalone app (7Geese) has an Org Chart page where the relationships defined in each user's profile are represented. Each employee is represented by a card that can be expanded to show the reporting lines.
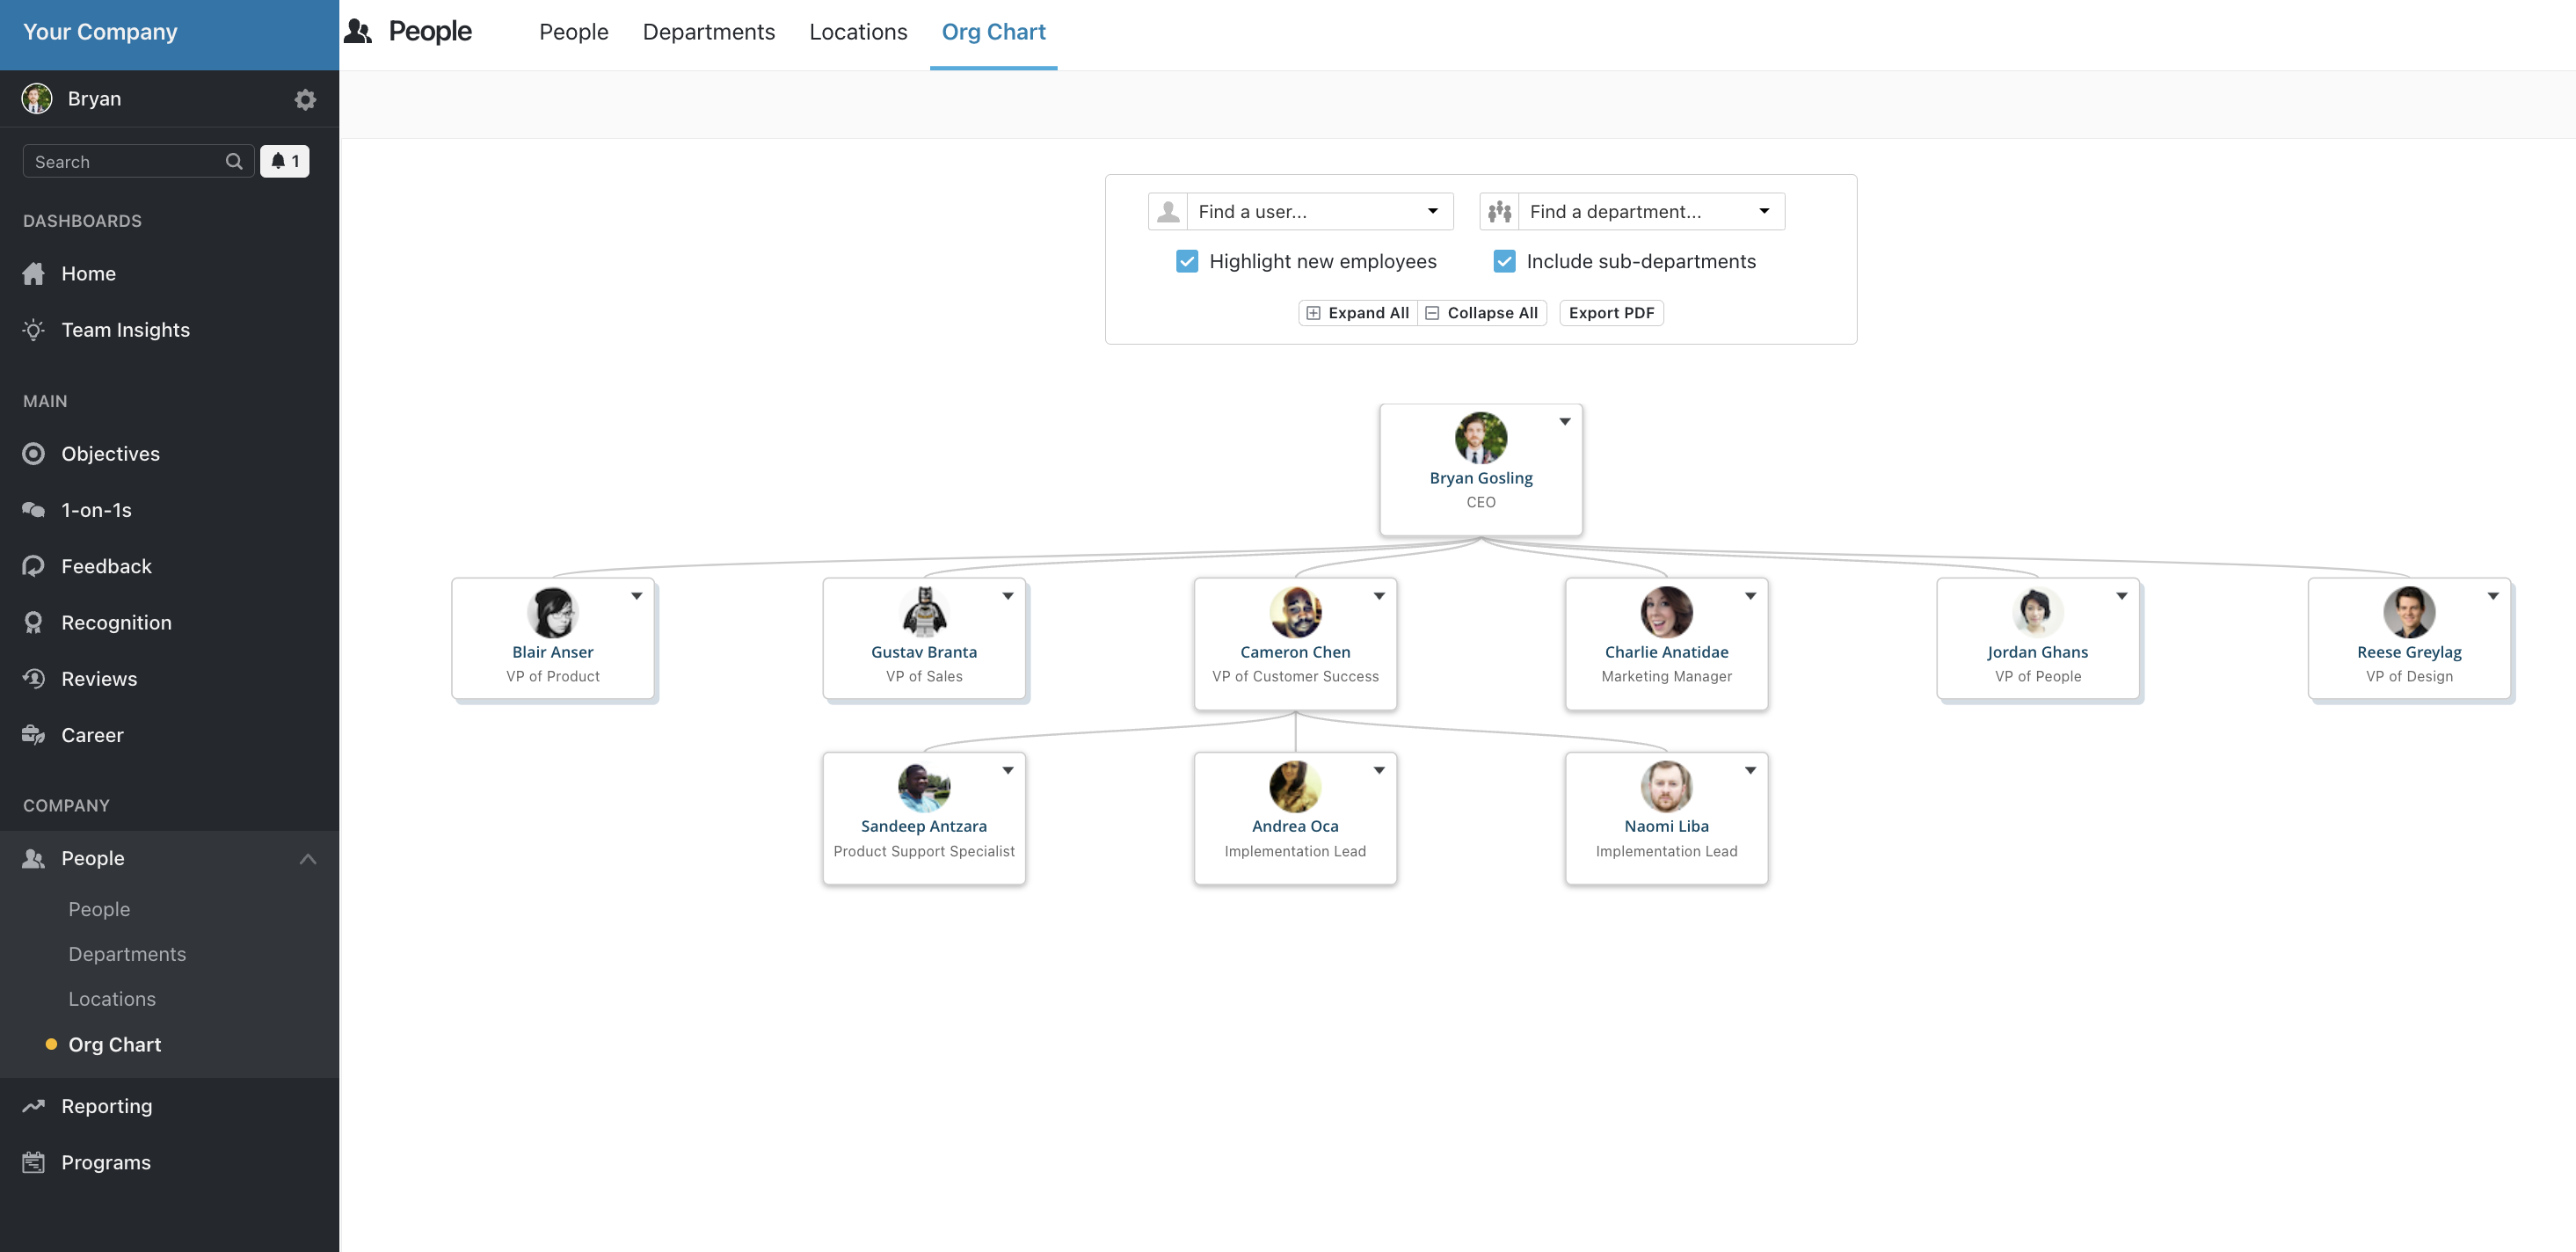
You can use the filters to find specific users or find people within departments, expand the visualization or collapse it altogether and can also export it as a PDF file if needed.
If you have vacant positions you can use the ghost-report functionality, which can help you visualize roles that are currently empty in your organization. To add one, go to the person they would report to, click on the drop-down and choose Vacant Report
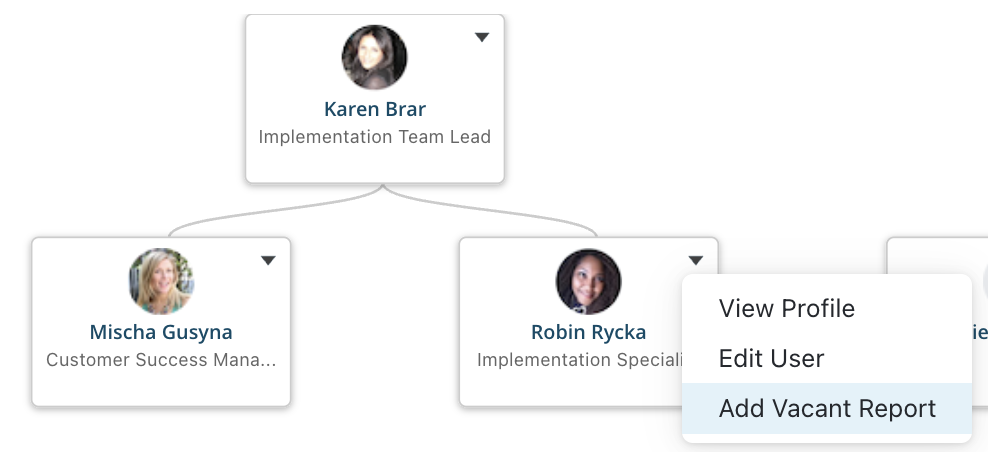
Note: The vacant report is not recognized as a user, so no other functions can be assigned to it (eg. assigning objectives to it).
Deactivating Users
It's important to keep your platform updated with your team's correct information. Part of this process is deactivating team members that are no longer actively contributing to the platform. This walkthrough will guide you through how to manage your network's users.
There are two workflows you can utilize to deactivate users:
- User-by-user through the hover-over drop-down dialogue
- En-bulk using the with selected filter
To begin either process head over to the People section via the secondary top navigation.
Deactivating Users: Individual user deactivation
If you're looking to deactivate one user simply hover over that individual and a drop down dialogue will appear on the right. From here select deactivate user.

Every time you deactivate a user you will be prompted to verify this selection.
Deactivating Users: Bulk deactivation
If you're looking to deactivate more than one user use the select boxes to the left of each individual's profile photo. Once you have selected everyone you wish to deactivate, use the With selected filter at the top of the list and select deactivate.
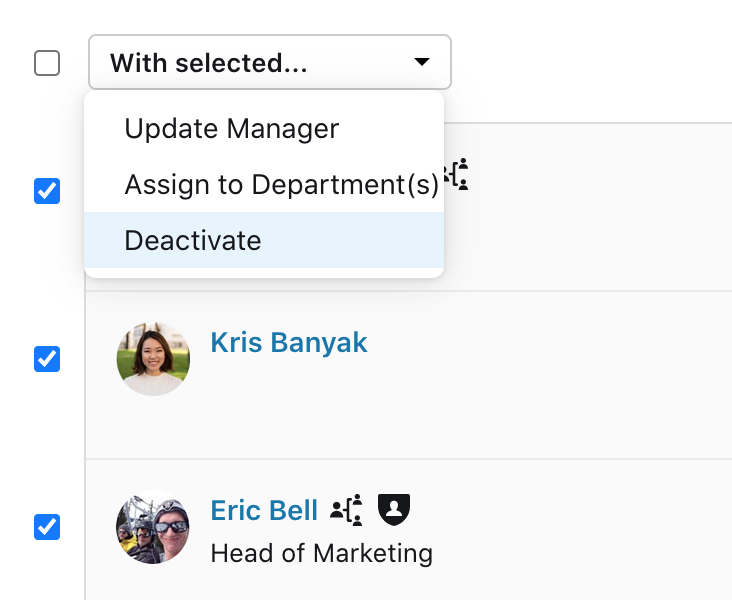
Every time you deactivate multiple users you will be prompted to verify this selection.
